


by Dennis Oldland
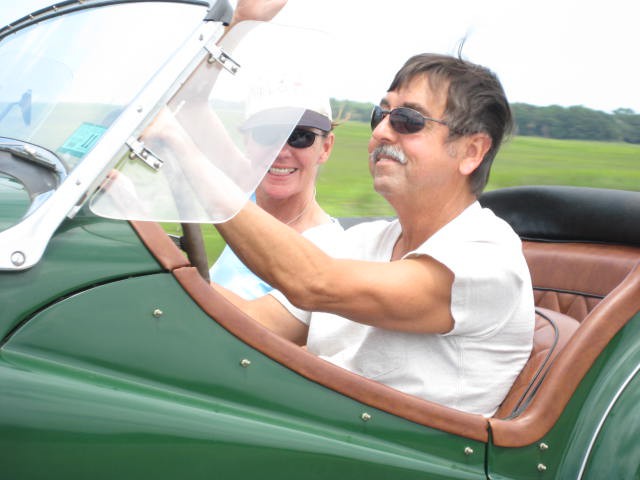
When I became the current steward of a ’60 TR3A, it was British Racing Green with a brown interior that wouldn’t have been too bad…in a boat! [1]

The previous owner had carefully crafted a wooden dash and wooden door panels and they looked nice, but…
Realizing how much work the owner had put into the dashboard, I gently asked him if, by chance, he saved the original. It was included in the deal. The owner said the car was restored in the late ’70s from two cars. The car was painted in lacquer and overall the finish was good. A British Motor Heritage search indicated that the original color was Silverstone Grey, which only came with a red or very rare light purple interior. Since it was going to be a few years until I retired and would have time to restore the body, I chose a new black interior to go with the green rather than drive around in a Christmas car.
A retirement plan formed: do all the work, except final color, in my garage and have a pro paint shop finish it off. Exploring the attic, I found my old body tools, sanders, and paint guns so a big chunk of expenses were already covered. I have painted cars at home before and no matter how much plastic I hang on walls, paint gets on everything and finds its way into the house, too. Then there is the amateur painter X-Factor that comes into play. Even when you have done all the prep work right, for some reason shooting the color results in orange peel, runs, dry spots, and other nasties.
The only way that I could maintain focus was to take one corner of the car at a time, strip it, work the metal, fill with lead if needed, acid-etch it to prevent rusting and move on to the next section. When it came time to prime, I would sand with 220 to remove the etching.
After working on the car for a bit I realized the title of the article needed to be changed as the body had been reborn under the PO and was actually a shell of Bondo™ perfectly shaped to look like a TR3 with some connecting metal underneath. New Title: “Mining for Metal…Any Metal Will Do!”
Whoa. So Many Colors, Man
Paint removal is always an adventure. You never really know what you’ll find until you get to bare metal. This car came with undercoating sprayed everywhere there was not body color, including under the bonnet as well as the entire boot and spare tire space. It did not come off easily, so I reluctantly used chemical stripper on these parts but abrasive removal everywhere else. [2]

With the interior removed, I looked down the cavity usually covered by the dogleg panel and saw light through the bottom of the car. When I removed the rubber plug under the cavity, I was greeted with a seemingly unending flow of dirty, rusty sand. The light bulb went off: Someone sandblasted the panel and forgot or couldn’t remove the leftover sand, which continued to provide a damp bed suitable for the rust demons to make a nice, moist home. Never a good idea to sandblast a cavity unless the car is on a rotisserie. The proper repair required cutting out steel panels, forming them, and welding them in place. This was followed with lead body solder and a bit of plastic filler. If you don’t have the skills and tools to do the auto repair, you may consider bringing your car to an auto repair shop. [3]

The rocker panels I could buy. That was good news. The bad news is that they are formed straight from front to rear and on the car the panels have a slight curve inward at front and rear. Rather than build up the middle of the rocker panels with filler, I cut a slit about 6 inches long on the top and bottom horizontal surfaces, opened up the slit a bit, clamped, and welded close. It worked. All that was needed was to cover the welding with lead and fit to the car. [4]

Step to the Rear Please
On the rear apron are blind box sections behind the bumper mounting area—meaning, it was impossible to get behind and do body work with hammers and dollies. One side was so damaged and crinkled that it had to be cut out and replaced with new metal. In this section and several others, I dug out up to a half inch of plastic filler. I was amazed that the filler had not cracked or otherwise shown on the surface.
[5] [6] [7]


As mentioned, this car was built from two. There was evidence of welding two rear apron sections. So if they spliced in the “good” section, I would have liked to have seen the bad half! [8]

The car took a fairly hard hit in the right rear to the point that it took a bottle jack to pry out the corner reinforcement under the car. The damage extended down the rear fender which had a long crease and several holes intended to make the way-too-thick layer of plastic filler bite. [9]

The boot lid wasn’t too bad and only took a small bit of lead to fix some dings.
Doors of Horror
The doors had amazing and illogical damage that it deserves mention. I could only envision that the door was hung in a barn and used for shotgun practice. No event in nature would have caused the number of small dents in only the door and not the surrounding panels. The first door was a problem. The second door was just depressing. Not only had it been in a shooting gallery, but the bottom was rusted out. I was able to get a donor door in excellent shape from Team Triumph, a Moss distributor. [10]

It seemed wise to fit up the “new” door to the car to see how it lined up. Hmmmm. Not even close. The rear of the door was banging against the B post. So how do you adjust a non-adjustable door? The Engineers of Triumph (And perhaps other marques) soldered in a section of lead on the forward edge of the B post in order to adjust the closing gap. Brilliant! [11]

So it became a matter of filing the strip in order to get a nice gap. This gap is also shared with the uninstalled new rocker panel. Seeing how the factory guys made adjustments possible, I figured I could do the same thing on the rocker and made a fence/form of flattened copper tubing and dripped molten lead into the fence to make my adjustable edge on both pieces and Bob’s your uncle. [12]

In the Cave of Darkness
Onward to the Catacombs of Rust, the oft-neglected Cave of Darkness where mighty steel can be turned into little brown flakes unseen by the eye.
Most British cars have a cavity between the rear of the front inner fender and the A-post that is a breeding ground for rust. It gets fed water from the seam between the fender and body and a lot of damage can occur before it is visible. On TRs 2 through 6, this space can be sealed when the fender is fitted up to the car. Mine was not too bad. Checking the unseen portion of the fender, I scraped the fender where the rubber seal meets the inner cavity and found pocking under the undercoat. Aha, the deception of undercoating. One never knows what is under the undercoat no matter how good the surface looks. Since this isn’t a “how-to” article, the details are skipped, but the basic protocol is scrape, convert rust, encapsulate rust and seal all edges, then undercoat. That should be enough to go another 50 years. Where blind panels had no drain holes, one was added with the plan being to inject a waxed oil blend up inside all drain holes after final paint and then plug the hole. [13]

One front fender suffered damage, though not as bad as the rear. After chipping off another half-inch of filler, the fender was rusted below the filler as well as it being so thin and fragile that one hammer bump broke through, so no repairing here. As it were, none of the patches had been just flat—all had some curve arrangement. Made me wish I had a leather sandbag and mallet to form the metal easier. Patch panel shown beside the discard. [14]

Now the problem was lining up the body contour of the fender with the front apron, which also had similar damage. That sentence represents about a month of work before getting the shapes to be acceptable.
The Voyage of Discovery: Primer
When you get to the point of final sanding before priming, you can trust nothing. You can’t trust your touch or your eyes. Even using your off hand and eyes closed, you think you have found all the taters and craters, but you are likely wrong. Trying to check the flatness of a white-primed body panel in bright daylight is blinding. Actually the best sunlight is late in the day. It is amazing to see colonies of missed opportunities grow before your gaze in the setting sun.
So the discovery coats of primer were applied and the result was immediately depressing. How could I have missed that and THAT?
After seeing the damage on all the other corners of the car, finding the nose a mess was no surprise. Repairs here required a basic reshaping of the nose after removal of all the filler.
Using body tools, a contour gauge, and the grille, the shape returned without either bending the grille into a convex or concave shape. TR3A grilles are supposed to be flat. It took several guide coats to find the last bits of offending filler putty and sand them to lay down flat and stick-sanding was the best way to ensure flatness—actually the whole car was stick-sanded to 120, then 220, then 320 grit. This work was best done inside with overhead lights off. Outside in the glaring sun with white primer, it was nearly impossible to see the finish without getting snow blindness. [15]

Saving the Best for Last
I followed the rollback to the paint shop carrying the bonnet, boot, spare lids, doors, etc. in our truck along with all the paint codes I could find and some photos of TR3s in Silverstone Grey to help the painter mix the color. The painter called me back. All the codes were obsolete. His European paint supplier sent several current chips that all were shown as Silverstone Grey ranging from very light to a near battleship grey. Turns out there are as many varieties of this color as British Racing Green.
My friends at Socastee Collision did another fabulous job. They did collision repair and have painted several cars for me, the last one being a Jaguar E-Type coupe about ten years ago.
As an appropriate end, on the very day that the car was put back together with all trim, a shelf broke holding a spare generator and other road trip items and the generator did a one bounce impact to the rocker panel which required… more body work.


'A Body Reborn' has no comments
Be the first to comment this post!