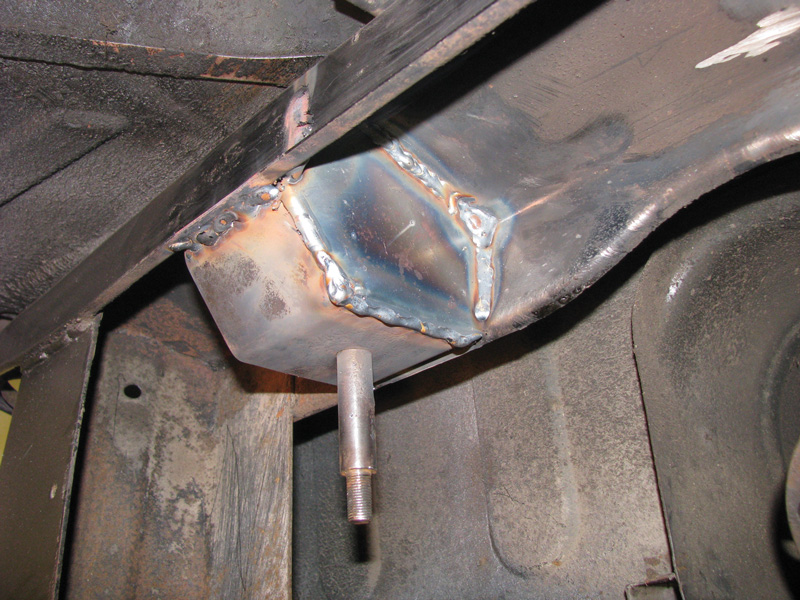
The Triumph TR6 is a fun car with enthusiastic owners, but it does have one weak spot that sooner or later must be addressed: the differential mounts.
What’s the problem? They’re prone to cracking. If not attended to quickly, the differential mounting studs eventually rip out of the frame.
It’s understandable since they’ve been subjected to mechanical stress for more than 30 years. Rust and a worn set of differential mounting bushings make the problem worse. Telltale signs are clunking sounds coming from the differential area. The right front mounting points are the first to go since they bear more of the torque load.
Even if the mounting points haven’t broken, reinforcing the mounting areas is recommended.
First Remove the Diff

While the job is easier with the TR-6's body off the frame, in the photo above you can see that there is room to remove the diff with the car securely on stands or a lift.

The Moss kit is designed to fit properly, and eliminate the clunking and movement associated with broken mounts.

The Moss kit includes all the pieces you'll need to refresh your differential mounts. While doing this job, we also recommend you take the time to install some new bushings as well.
To repair the mounting points, you’ve got to remove the differential. First remove the half shafts and drive shaft from the differential using open-end wrenches. Then take out the differential mounting nuts. Be sure to put a transmission jack or a floor jack under the differential to make your life easier.
With the differential out of the car, clean the chassis with grease cleaner, a wire brush and a wire brush wheel mounted on a 4-inch grinder. This job is easier with the body off the frame, but we realize that not everyone has the time to totally disassemble the car.
The Moss kits are designed to repair front and rear mounts with new studs and brackets. The front kit also includes reinforcing plates to help prevent future problems.
The Front Differential Mount Repair kit (#850-795) includes new studs, top plates, and enough side plates to brace both the inside and outside of the front mounts. Unless you are willing to remove the body from the frame, you will only be able to reach the inside mounts. Many owners feel that bracing just the inside of the two front mounts makes the mount assembly area strong enough for street use.
The Rear Differential Mount Repair kit (#850-796) includes replacements for the original parts.
Kits & Welding
Welding is required to install these kits. Do the job yourself if you’re a proficient welder. But bear in mind that access to the area is somewhat awkward and you would be welding quite close to the gas tank. If you’re not comfortable with the welding, you could still remove the differential and prepare the chassis before calling in a mobile welder. At this point, the welding job should take 30 to 60 minutes.
As part of the project, you should replace the differential mounting bushings as well. Moss sells standard rubber front and rear differential mounting bushings, as well as stronger poly bushings. If you’re running your car on the street, be aware that the poly bushings make the car ride harder and that might increase the tendency to break the differential mounts.
Also while doing this project, take the opportunity to inspect the rear brake lines, half shaft boots, and U-joints on the half shafts and drive shaft.
With repaired and reinforced differential mounting points, your TR6 will be quieter, safer, more fun to drive and more pleasant to own. Those are great results considering the entire project can be completed in less than a day.


'A Weak Differential Mount: Fixing a Common TR6 Problem' has 1 comment
April 2, 2013 @ 8:29 am Rear end work – Differential Mount, Trailing Arms, Shock Links | TR6 Restoration Lessons Learned
[…] had mine done – not with the Moss or TRF kit, but a custom job. When they pulled off the differential, we discovered my right side […]