Moss Tech 101 with guest lecturer, Eric Glomstad
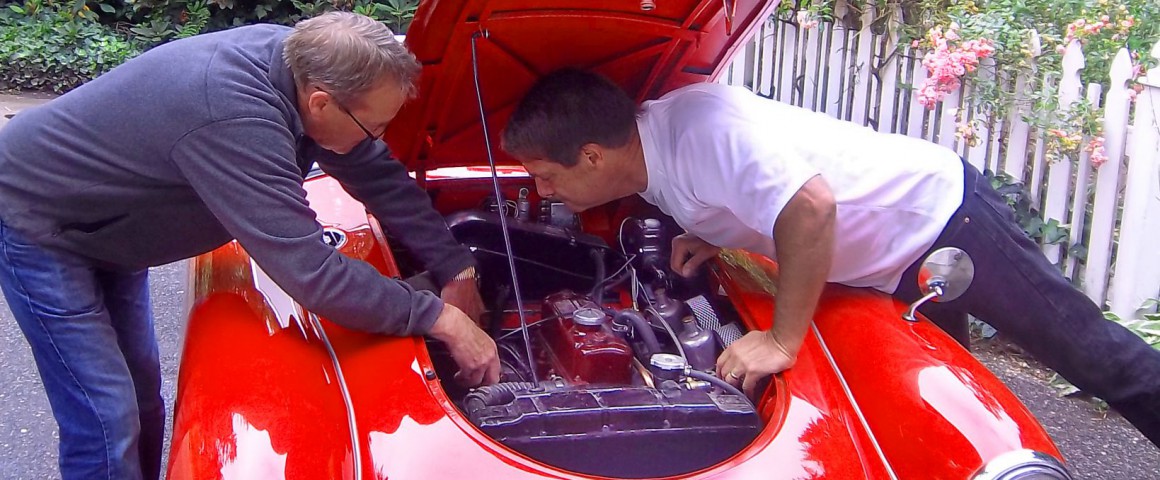
My brother Cal has owned his 1959 MGA since High School. It was his first car in 1974 and he cherishes it now as he did then. He called me to say that his beloved had developed a cough upon acceleration and asked for a little advice and assistance.
My father introduced the family to British cars in the 60s. His first foray into the rewarding but sometimes frustrating intricacies of wool and leather came in the form of a Jaguar. A 1959 Mark II Jaguar 3.8 to be exact. Since then, the family has owned and maintained Triumphs, MGs, Jaguars, Austins, and the occasional oddball Rootes product.
The pleasure of working on a simple motorcar with basic tools always appealed to me, so I was eager to have a go at my brother’s MGA. I packed a few simple diagnostic tools and headed out to his place, just a few minutes away.
The problem sounded like an electrical issue, so we began with a thorough check of all things Lucas, both primary and secondary circuits. The spark plugs were removed as was the distributor and coil.
The coil was tested with a digital multi-meter. The two leads of the multi-meter were attached to the coil, one lead to the center electrode and the other to one of the terminals. It doesn’t matter which one you use for this test. The meter was set to ohms and the readout was within specs. The coil is a big transformer and it should read 8,000 to 12,000 ohms. There was no problem here.
The engine easily turned over by hand with the spark plugs out. By placing a thumb over the number 1 spark plug hole, I could feel the compression stroke in this cylinder. While my brother pulled the fan belt and rocked the crank, I peered into the hole to determine when the piston reached the top of its stroke. This was confirmed by putting a bamboo skewer into the spark plug hole and rocking the engine by hand, watching for the highest point of travel on the end of the skewer. If you try this procedure alone, you can use the bamboo skewer, put the car into second gear and rock the car to see the skewer rise and fall. I keep a supply of bamboo skewers in my tool kit. They are useful for a variety of diagnostic procedures and will bend long before they break. Furthermore, there is no danger of them breaking and falling into the engine.
With the number one piston at Top Dead Center, we checked the timing marks and found that the engine was within range of the correct setting. Next, we put in a new set of points. Points are easily replaced with the distributor out of the car. We set the points to .015 using a valve adjuster gauge.
The distributor was reinserted into the engine. It can slide in one of two ways. To be sure that we had it in the right position, we checked that the rotor was pointed to the number one spark plug wire while the engine was set at TDC for the compression stroke of the first cylinder.
The plugs were cleaned, gapped and replaced. The plug wire ends were squeezed so as to make positive contact with the top of the spark plugs. The brass clips are typically soft and if not checked periodically, they become enlarged and will not make positive contact. The coil wire from the center electrode of the distributor cap was missing its copper washer at the coil end. A new washer was placed over the emerging wires and the wires were spread to hold the washer in place.
The coil electrode was pushed into the coil and the boot was secured with black electrical tape to prevent it from backing out under vibration.
There was a weak wire connection at the coil + terminal. This connector was replaced and the wire was re-attached to the coil. With everything back in place the car started instantly and idled smoothly.
After a period of warming up, the air cleaners were removed and each carburetor was tested for mixture; this is done by raising each piston needle assembly slightly, one at a time, and listening to the engine rpm. I used my bamboo skewer to reach into the throat of each carburetor to accomplish the task. If correct, the engine should increase rpm slightly as the piston needle assembly is raised, then fall off to normal idle. I found that both carburetors were much too lean. How did I know this?
A lean carburetor will stumble and die at this test, while a rich carburetor will “race” at high rpm. We stopped the engine and removed both dashpots to check the needle seats and jet orifices.
Both needles were set properly, at their shoulders, and the jets were centered. The piston assemblies were reinserted and both raised and fell easily with a satisfactory “click.” The dashpots were replaced and oil was added to each. This procedure is necessary, for a needle that is set too high or too low on the piston will change the mixture properties throughout the rpm range. Likewise, a jet that is not centered inside the carburetor base will produce erratic rpm. The piston should rise easily and smoothly when lifted. It should fall quickly and “click” when it reached the end of its travel. A bent needle will “hang-up” at this test and the piston will not fall smoothly.
At the base of each carburetor is a large brass nut, which turns against a coiled spring. Turning this nut away (down) from the carburetor will “richen” the mixture and turning it toward (up) the carburetor will lean out the mixture. I made several turns to each brass nut, away from the carburetor, counting the “flats” of the nut as each adjustment was made. This richened the mixture.
The car was started and idled smoothly. It had good power throughout its rpm. After a period of warming up, the mixture test was repeated for each carburetor and passed beautifully. The carburetors were tested for synchronization by inserting a small diameter rubber hose into the air passage of each carburetor and listening at the other end for the “pitch” of the hiss.
Since both “hissed” at the same pitch I knew that they were open to the same level, thereby “sucking” air equally at idle.
Finally, we went for a ride. This is the best way to test for power and timing. The car pulled smoothly up a nearby hill with no “pinging” or sluggishness. We were right on the timing! All told, it was a good day. The “cough” had disappeared and the MGA was breathing with a healthy roar!
MM


'MGA With A Bit of a Cough' has 1 comment
October 27, 2016 @ 1:53 pm Pete Bachand
Just as a heads up, the terminal that you are using on the plugs is NOT a plug type terminal but intended as a push in/male for the distributor cap or coil. The correct terminal would have a spring loaded retainer around it to keep tension on the top of the spark plug. The washer shown for the coil should not be used on a push in type coil but for a screw in/early type coil, the boot is NOT a retainer and you will eventually have an intermittent spark issue. The terminal shown being used on the plugs is the correct type for your push in type coil.