by Mike Ferguson,
Member of the
Positive Earth Drivers Club
Periodically, and against my better judgement, I publicly proclaim progress on my now 34-years-and-counting ground-up restoration of my ’63 Austin-Healey 3000 (BJ7). Well, it’s time to bring out the soapbox because a lot has happened “suddenly” in the last two years. Of course, the amount of progress planned and desired never matches the results, but the joy of the process and partnerships continues to reign paramount. In other words, I’m still having fun! So, let me ramble about the highlights of the past 24 months in hopes that some facet of these steps inspires, amuses, or confounds you.
Life on a Rotisserie
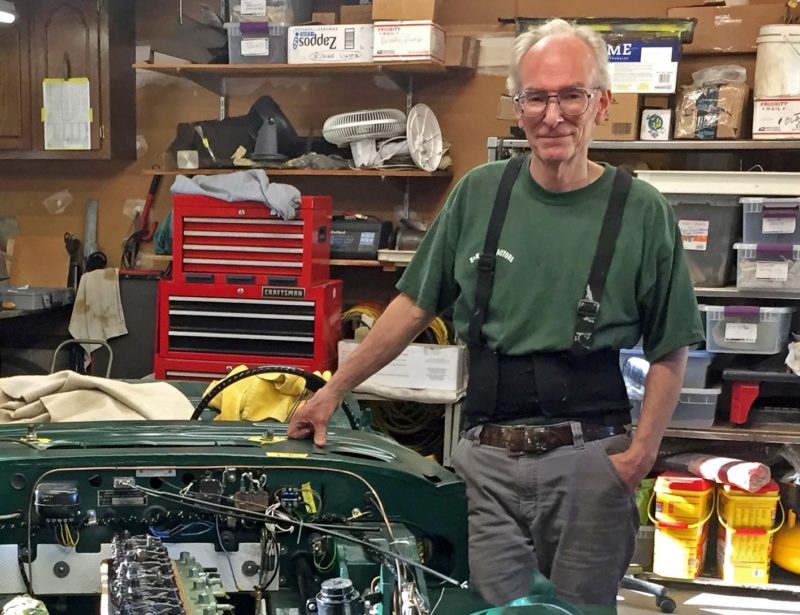
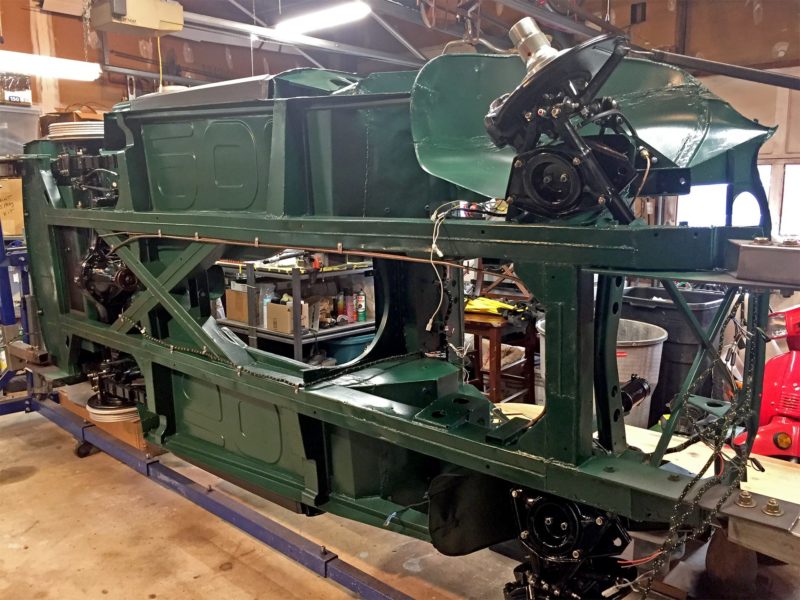
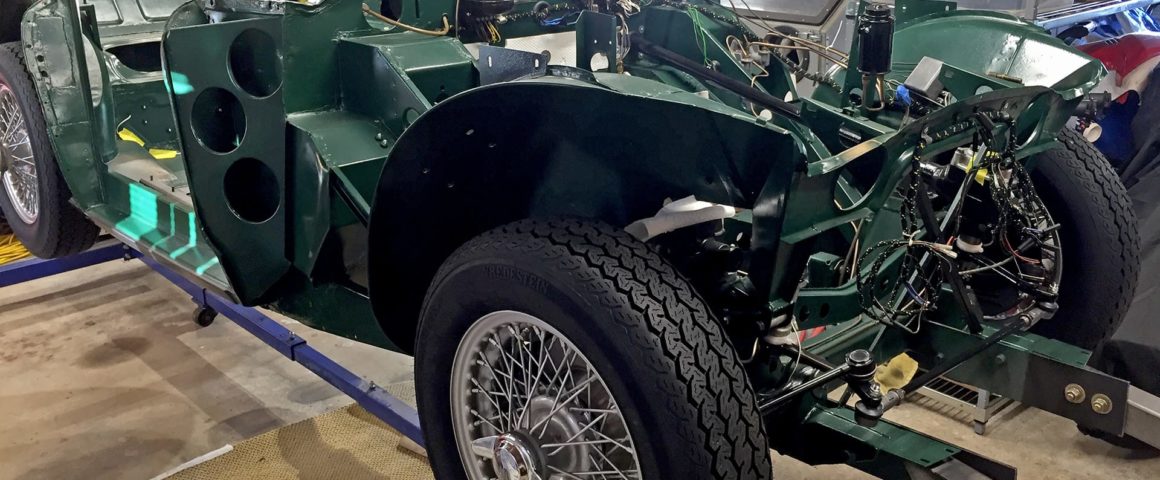
Choosing to do a nut and bolt restoration, I made a few wise purchases—a professional two-stage 60-gallon compressor, a blast cabinet, and, in particular, a rotisserie. A lot of work happened on that rotisserie where my approach was to repair and assemble everything car-part-possible on the chassis just short of the engine and transmission. It was such a joy to work on the car where any area is immediately at the most comfortable and convenient position with a gentle push of the carcass. Even with the car “loaded,” I could rotate it 90° to work on the bottom. Prior to installing the differential, but with all other suspension parts on board, I was known to do a 360 on occasion—there must be an Olympic gold medal for that move somewhere.
While the car was on the rotisserie, I restored body and frame sections, switches, suspension parts, shocks, differential, etc., and I replaced wiring harnesses, anything rubber, hubs, bearings, wheels, brakes, clutch components and lines, the gas tank and, generally, anything consumable or that could be life-threatening due to age or wear. In short, every component, nut, and bolt was addressed. I’ll miss that rotisserie; I did sell it recently. Yep, very unlikely I’ll do another ground-up restoration. If you hear me talking like I’m considering another one, call the men in the white coats, stat!
Yes, it was cool having a chassis on a rotisserie. It was always a hit with family and friends when they’d visit. A drink or two invariably led to questions like, “Hey, what’s happening with your car? An Austin what? Will you ever finish it?” So, we’d move the soirée to the garage where I’d do my “360 gold metal spin” move for them. It does freak out non-car-restoration types as they’ve never seen a car from that perspective, nevermind from this level of disassembly/reassembly.
OK, It Looks Nice, But Does It Run?
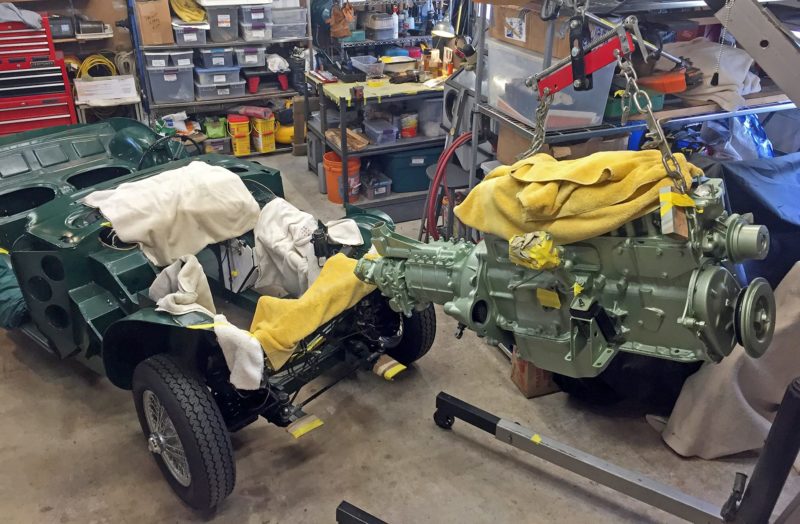
On February 4, with a perfect 10.0 dismount performed by Frank Muratore (my dear friend and British car cohort) and me, the rolling chassis was finally on terra firma and ready for engine/transmission installation. The engine was rebuilt by British engine (and more) builder extraordinaire Mike Kusch of Hourglass Motorsport. It was a great pleasure to work with him in the process for my own education and enjoyment, as well as to hear Mike’s stories of British cars and bikes, vintage races, and more. Although I had rebuilt several engines myself “back in the day,” those were different times. When you wanted to rebuild an engine, you pulled it, ripped it apart, and went with all necessary components to the local auto parts store that also had a full machine shop staffed by expert machinists. They then measured and advised, you bought parts, and a week or two later you got all your parts back, reassembled the beast, inserted the key, and went for a drive.
Gone are those days of one-stop engine-rebuild shopping. That’s where Mike comes in. He’s an expert machinist and engine builder (as well as diff, trans, etc.), and he knows all the right people to call on. By example, I wanted to keep my BJ7 camshaft, as I want the car to run the way it was designed and came off the lot, not with the typical BJ8 higher-lift cam replacement (despite a few extra hp). Mike knows “the guy” in Washington state who rebuilds these, so off my cam went to WA, and back a few weeks later in as good as new condition! Mike pulled several other rabbits out of his hat along the way including rebuilding the differential, pressing hub bearings in, and doing any other task I either didn’t have the knowledge, skills, tools, or the courage for.
Jump ahead a few months, clean, paint, and assemble the Healey engine/ trans beast (it truly is), install said beast, insert key, push starter button, and drive. Well, maybe not; it is a Healey after all. Instead, my now-proven process for things like this is:
1. Discuss ad nauseum with Frank Muratore until I push him to the point of his saying, “Let’s just do it and stop talking about it or else this car will never get done.”
2. Call Bob Pense (club member and everything-Healey expert) for his sage advice.
3. Review plans with Tom Vash (legendary club member and Healey expert) coupled with a visit to his garage to see what I’m getting myself into. And,
4. Check in with Mike Kusch (one town away) to be sure he’ll be available
on the momentous day in case of emergency.
So now that I’ve aligned the stars, it’s go-time! Let me not belabor the process but suffice it to say that this is one BIG BEAST to drop into one ITSY-BITSY space, never mind at an angle that would terrify the best fighter pilot on a training run. It took us two passes to succeed as we were too cautious the first time—something about pitching 728lbs at what felt like a kamikaze angle, suspended on two chains simply bolted to the engine, being pushed around on an engine hoist, wavering as it goes, saying “don’t put any body parts between it and anything else.” It’s an event that will cause one to pause, maybe even take stock of one’s life. Well, on the second run, we just cleared the front cross-member and slowly lowered the beast into the itsy-bitsy space while moving the hoist toward the car. As we lowered the engine into place, mount alignment was actually simple thanks to what I now call “Pense Pins.” It’s two bolts threaded into the mount pillar on each side of the engine with their heads cut off . . . simply align the engine mounts already on the engine block with these pins and drop engine! Yes, a Bob Pense idea. Of course, there is a ton more to consider and do in this process, but, close enough.
Little Silver, New Jersey, We Have Liftoff
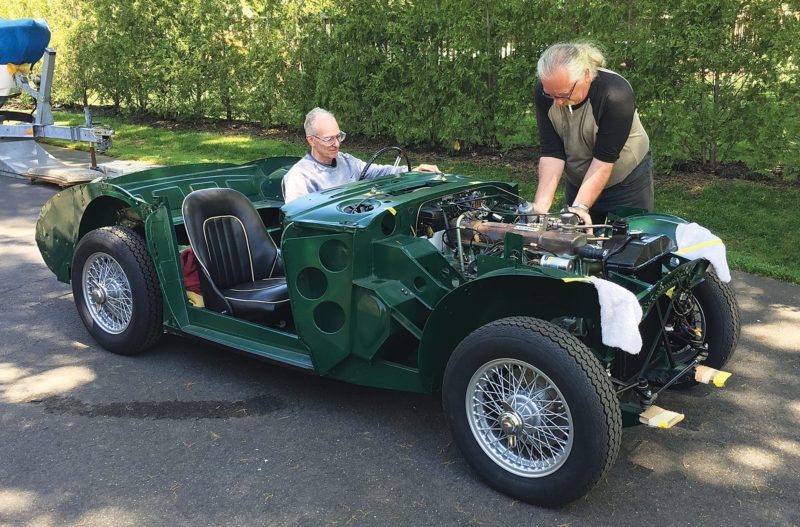
Finally, it’s time to see if it works. Until now, everything was theoretical. I think the wiring is correct. We think the fuel pump has ample psi’s. The fuel is Top Tier Sunoco 94, so that should help fend off non-start demons, right? In fact, I tested all wiring and components as much as possible, stand-alone, but this is the first time that they must all work together… play nice. You know, start.
Well, with Mike Kusch at the helm (trust me, me in the driver seat in the photo is NOT the helm) and, with his cigarette at the ready, as always, to lend that little extra to ignite that Top Tier fuel if needed, I turn the key and push the button. The first go produced what Mike technically calls “farting,” in fact, a good thing in this case. Second push of the button, Kusch working the choke manually, and we have lift off. That was one ecstatic moment for me, Frank, Mike, Ray Carbone from Heaven above, my wife, kids, neighbors, even my lawn guy. They’re not shown in these pics, but they were there just as they’ve been there for the last 34 years wondering if this day would ever come. Sometimes I wondered too. Now I know, without doubt, that it was all worth it, because the fun and excitement the Healey created that day for my dear family and friends, it’s been doing in its own odd way for me all these years. Note: The engine was seized when I bought this beautiful rust bucket, so this is the first time this car has run under my ownership and in 34+ years.
Epilogue
More has happened in the past year, but I’ll leave that for subsequent articles. Things like building a paint booth in my garage on a shoestring ($60) budget, media blasting, priming and painting exterior panels in that spray booth, and body panel fitting. All great learning experiences, great fun, and sure to be a hit at our next cocktail party. MM


'Confessions of a Healey Addict' has no comments
Be the first to comment this post!