


By Craig Wolever
I bought my first MGB new in 1976. It was red with wire wheels and knock off hubs. Loved that car. A month later, my girlfriend got pregnant. So we got married and, nine months later, I had to sell the MGB. I always regretted it. Fast forward 20 years. I was driving with my new wife and saw a red ’76 MGB for sale in someone’s front yard. We decided to take a closer look. It was in pretty rough shape. The interior and convertible top were shot, there were rust holes in the fenders and floor, the black bumpers were gross, the windshield was broken and needs a total windshield replacement, tires were worn, and it looked like it had been painted with a roller. But, it was a ’76 MGB!
It started, but ran pretty rough. I think we ended up paying $2000 for it. Thought I was getting a good deal. Silly me! Barely made it the 20 miles home. Found out one of its problems was a bad fuel pump. I replaced it a week later through an auto repair shop with a modern pump and that helped quite a bit, but there was still a lot of room for improvement. About a month after I bought it, we started working on our house. So the car got stored in my brother-in-law’s shed—for 15 years!
After a time, we moved to another house with enough garage space to do some serious work on the MGB. During the car’s decade and a half of storage, I had gained about 50 pounds. So the first thing I did to the car was to put in a 2-inch smaller diameter steering wheel so I could get in and out. Next project was lowering the MG by two inches. I used blocks on the rear axle and lowered the bottom seat of the front coil springs. Looks cool, but, for an old fat man, it’s work getting in and out!
Keep in mind that I’m retired and on a fixed income, and a tight budget. So I couldn’t hire out any of the work. I started watching all the car builders on tv, seeing how they did the sheet metal and body work. I didn’t know for sure what tools I needed, but decided that when I needed tools, I would either borrow them, or buy them from Harbor Freight. Any parts I needed were purchased from Moss Motors. If you’re looking to buy a used car to build, click the link to learn more and start your own budget-friendly build.
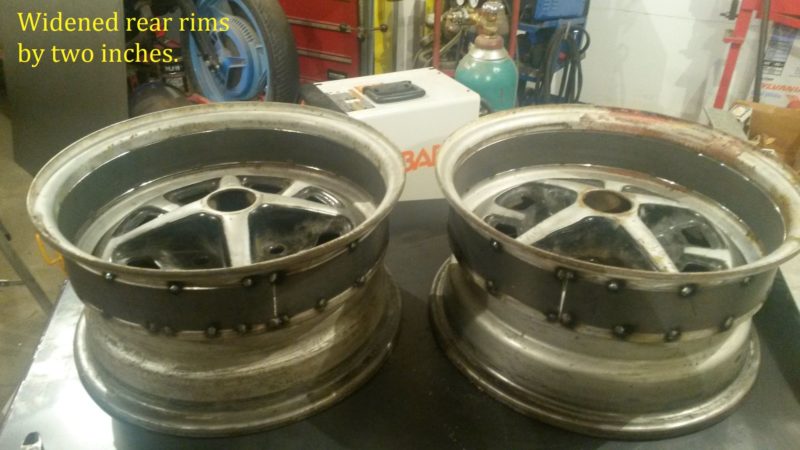
I decided to do something about the wheels. Custom wheels and tires weren’t in the budget. My MG just had the stock wheels with lugs. I figured I could strip them and repaint them. As I was doing that, I decided that the rear wheels needed to be wider. On one of the car shows I watched some guy cut a rim in half and weld new steel between the two halves to make it wider. I thought I would give it a try. I marked the rim with a perfectly straight line down the center and cut it in half. Then took a strip of 1/8-inch by 2-inch wide steel and shaped it with my Harbor Freight roller until it was the exact radius as the rim. I clamped the two halves together with the 2-inch spacer between them, constantly measuring to make sure everything remained square. Then I started slowly tack welding the pieces, again, constantly measuring to make sure everything stayed in place. Once there were enough tack welds to hold everything tight, I welded the seams solid. I got lucky. When I was finished, the rims didn’t wobble and required very little balancing. Then I mounted some wicked wide tires on the rear. That created more work because there wasn’t enough room for them. I had to build a radius into the quarter panels so the tires would clear. It finally worked out.
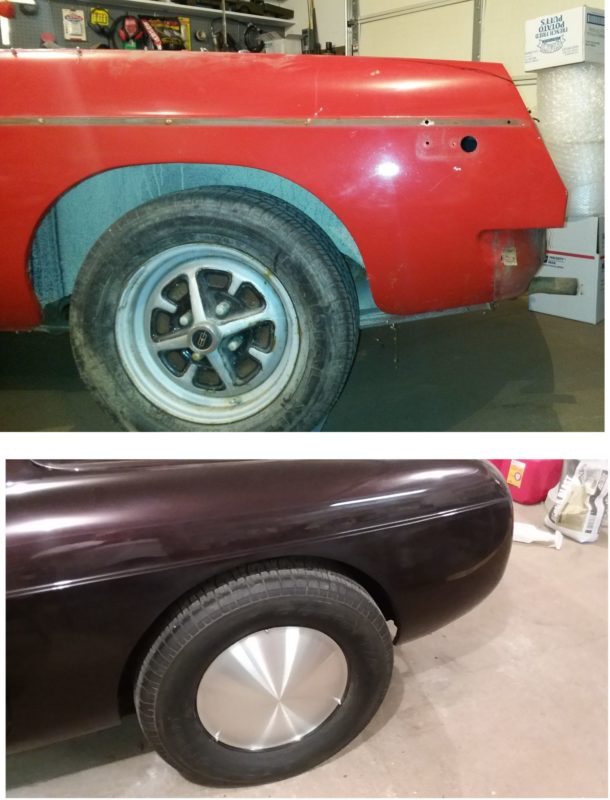
I stripped the car to bare metal and discovered all the body filler and rust holes. I decided that I needed sheet metal. I bought a 4 x 8 sheet of 18 gage. I have less than 1/2 of that sheet left! I started with the front fenders. I cut the rust out and replaced it with new steel. Next was the floors. That convertible top must have been leaking for quite a while because the floors were rusted through. I cut out the rust and welded in new steel.
Then it was time to do something about the crappy seats. They were shot. I priced new seats and they were out of my price range. I did a little shopping and found some new fork lift seats that were completely water proof for $60 each. They worked great and are surprisingly comfortable! The interior door panels and the panel behind the seats were shot. So I bought a sheet of 1/8 inch hardboard at Menards and cut panels to fit. Then I went to a fabric store and bought a cheap roll of black vinyl. Glued the vinyl to the board, and I had interior panels.
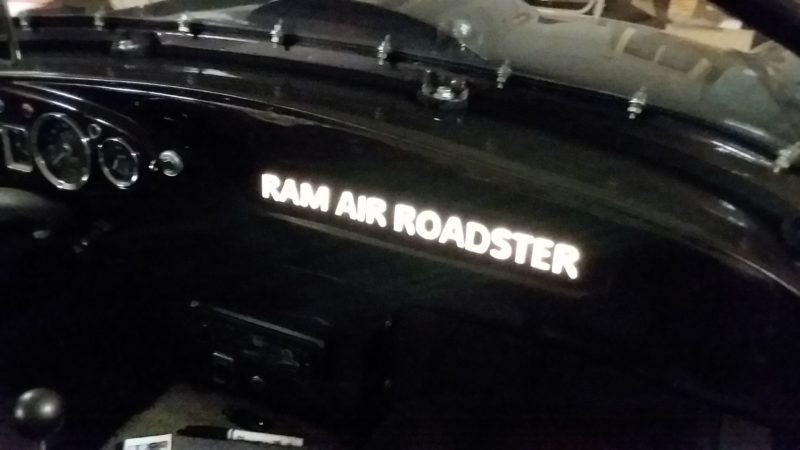
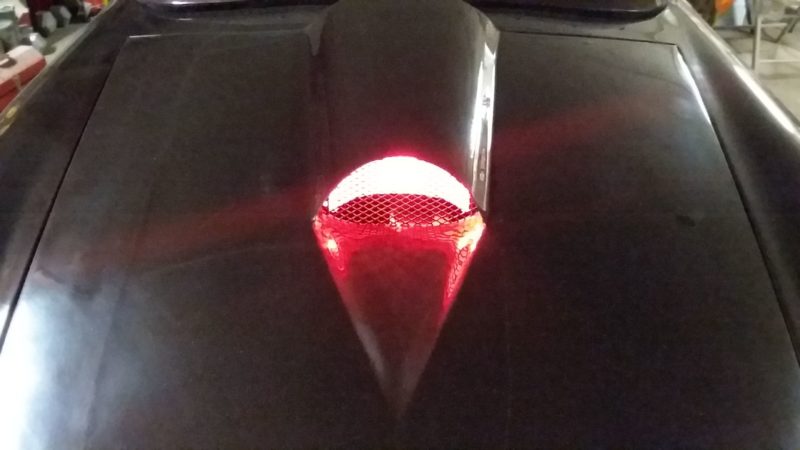
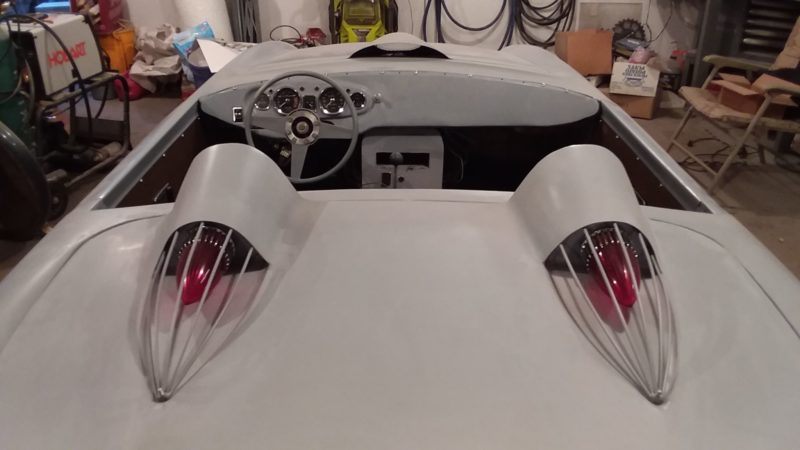
Next project was the dash. It was padded vinyl and cracked all over. I removed all the vinyl and padding, sanded it, and formed it as a wrap-around piece to fit the wrap-around shape that I welded into the doors. I also filled in the glove box slot and cut the words “RAM AIR ROADSTER” in the metal and installed soft light behind the letters so they glow. The wife and I decided we would give the car that name after I fabricated a ram air system for the carburetor.
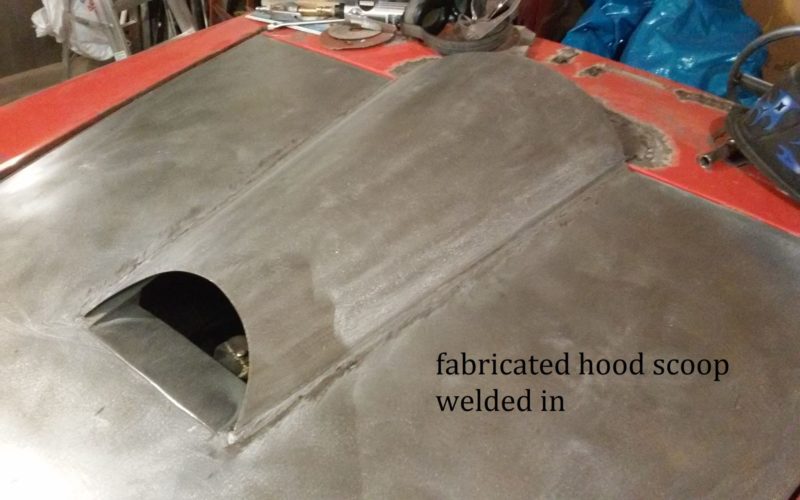
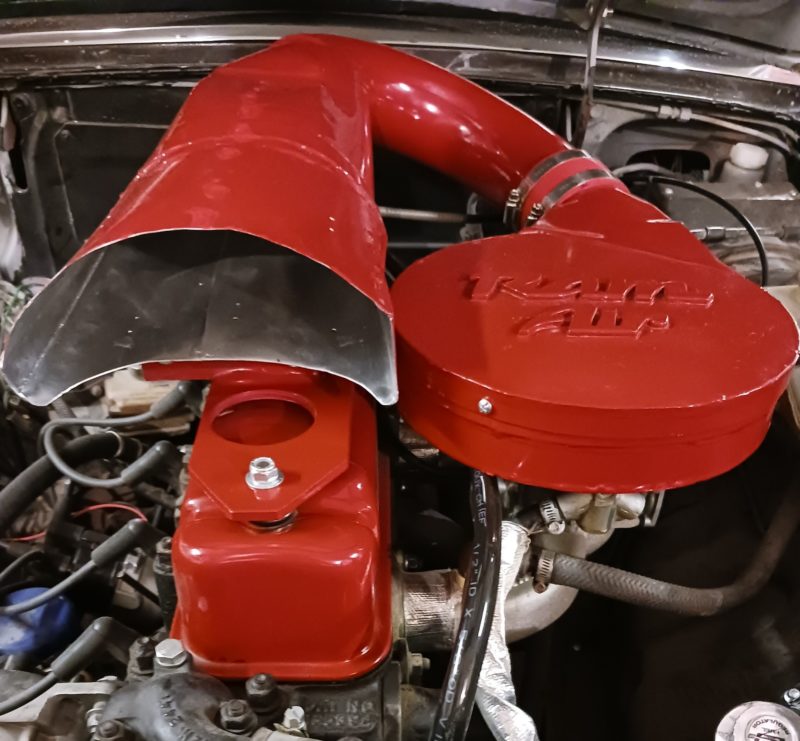
Speaking of ram air, I ended up installing a Weber carb and intake, built a header and exhaust system (which exits on both sides of the license plate), installed a solid state distributor, and a blaster coil (I believe all were purchased from Moss). I had previously customized the hood by fabricating a hood scoop and welding it in. I decided to, somehow, make it functional. That’s when I got the idea to fabricate a “ram air” system similar to those that I’ve seen on cars in the past. In the photo, you see how it turned out. Made it out of scrap metal. And I swear that, once I get over 40 mph, the car starts pulling and won’t stop! It made a huge difference in performance!
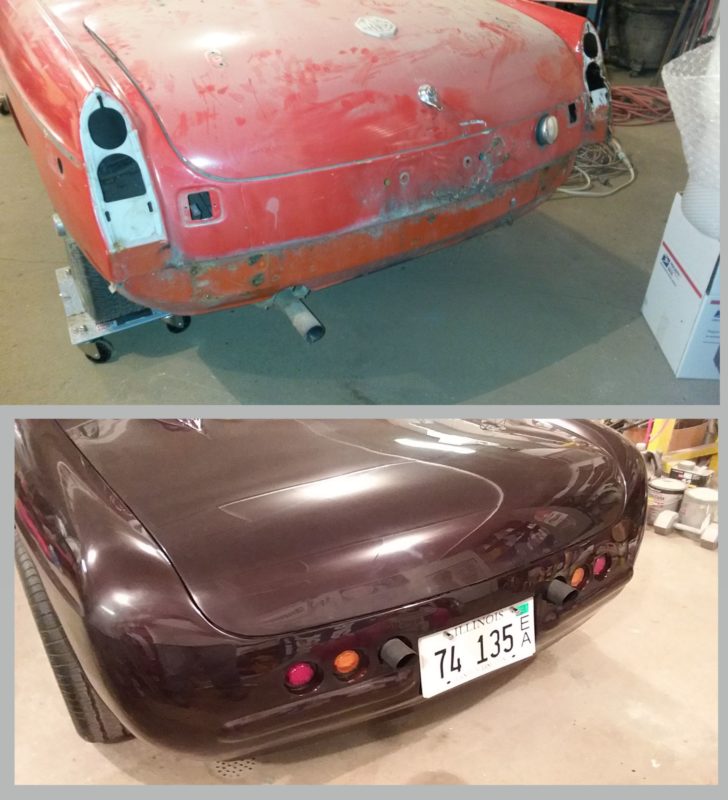
As you can see by the photos, the rear of the car is also totally changed. I lengthened the trunk lid by welding about 18 inches into it. I also fabricated and welded on aerodynamic head rest pods (fairings) and installed functioning ’59 caddy taillights onto them (bought the caddy taillights at a flea market 15 years ago). I cut out the stock tail lights, filled the holes with steel, and replaced them with 2-inch LEDs on both sides of the rear license plate (which I recessed). While I was at it, I removed all the body seams by welding them solid. That’s cool until you have to repair a panel, and have to blend the paint because there are no seams! Just remembered that I removed the trashed black rubber bumpers. I welded some little bump bumpers on the rear, but haven’t decided what to do on the front yet.
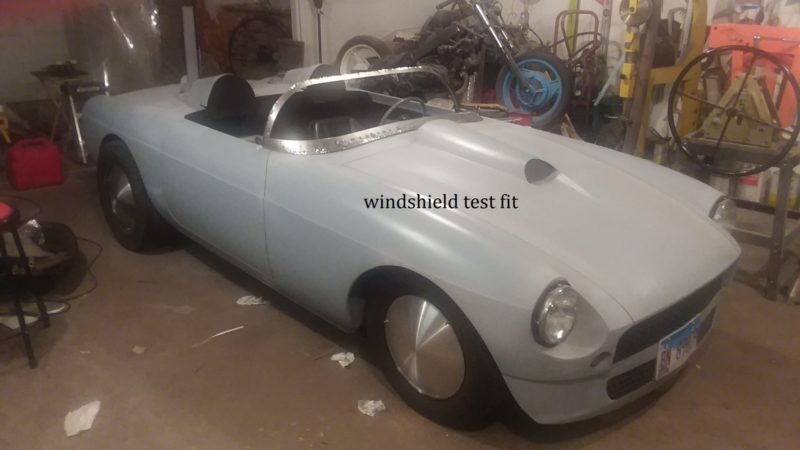
The stock windshield was broken and bent. Replacing it was not in the budget. So I built one. I started by making an outline by welding 3/4-inch electrical conduit to get the general shape. Then I used scrap pieces of sheet metal to finish the shape. Formed some 1/8 inch Lexan with the help of an auto glass repair service to make the windshield glass and it turned out pretty good for my first time! Because of the angle of the new windshield, the windows in the doors would no longer work. So I removed them and welded the openings shut. The car has no windows or top, so now it’s a true roadster.
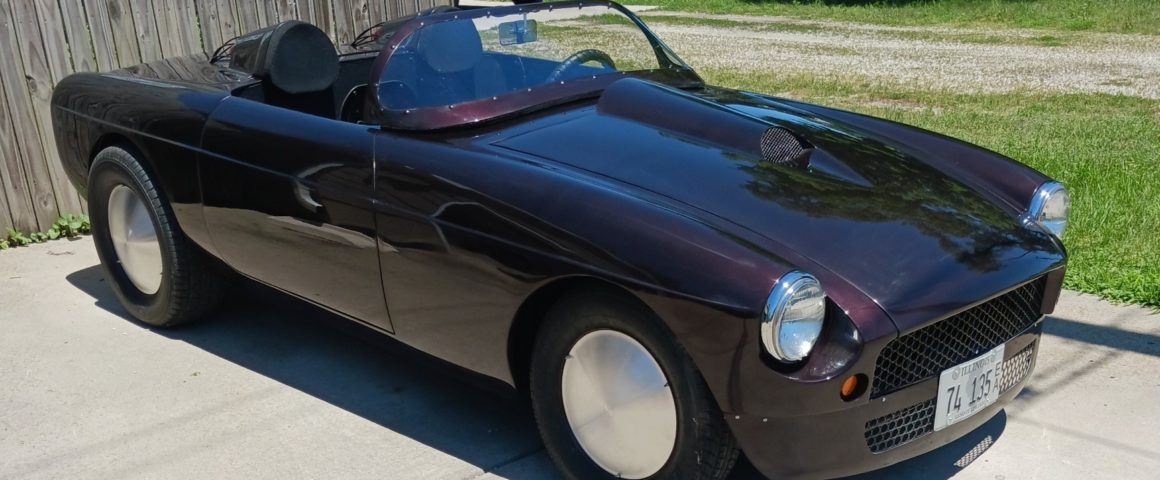
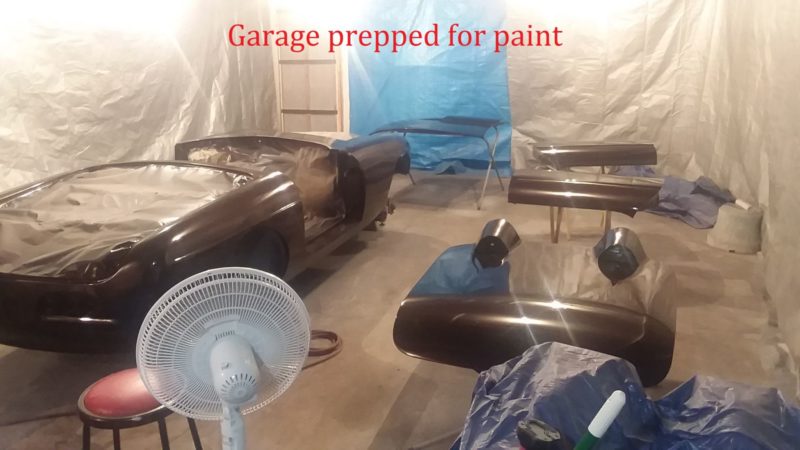
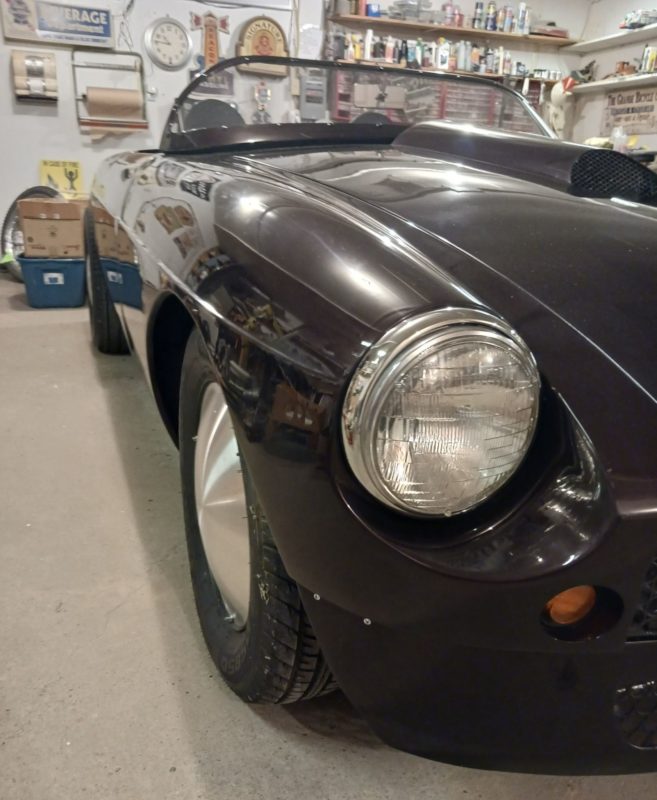
I wanted the body to be as smooth as possible, so I shaved off all the handles, locks, latches, chrome trim, antenna, and gas filler tube and cap (gas cap is in the trunk). I put on two coats of epoxy primer, three coats of urethane primer, three coats of urethane base coat (Bonneville Black Cherry Pearl), and four coats of urethane clear. Gave it a quick cut and buff so I could drive it this summer. Will finish the buff and polish in the fall.
I realize that I will never get out of the car what I’ve put into it. That was never the plan. I just wanted to try new things, learn by doing, and build something unique. It has been a long, strange trip to finish my MGB, but it’s finally done. I would like to thank Moss Motors for all the parts and help, and Eastwood for the paint. The car turned out pretty darn good for a BUILD ON A BUDGET!

'Dream It and Build It' have 9 comments
August 28, 2022 @ 5:21 am Randy Forbes
Absolutely WOW!
I bought my first MGB (also new) in 1973 and have had nearly every model since__I’ve never owned a 3-main engine model__but I’ve never seen any MGB taken to this level of customization. Good job!
I’m actually on my 17th & 18th MGBs at present (quite literally combining the front inner fenders and frame rails of a ’67 GT with the cowl-back portion of a ’66 GT bodyshell) the goal of this project is to restore the ’67 to its “original” condition. Zero modifications are planned, keeping it stock right down to original rubber floor and sill coverings. Please don’t think that I’m a purist though, as the last MGB GT I built (around the mid to late 1990s) used a Buick 3.8 V6, I’m keeping my current project all stock to atone for my sins in the past 😉
I hope that you’ll keep us updated with new developments on your car, as I’m sure you still have more ideas in mind!
August 31, 2022 @ 6:56 pm Craig Wolever
Thanks. Reading your comment, I think you’ve had a lot more experience than me! Sounds like you’ve had some great projects too! I’ve been considering a v6 too. I thought I’d look at maybe a turbo v6. I’m gonna drive it the way it is this year and maybe next year get into it again. Keep on keepin on!
September 25, 2022 @ 12:15 pm Al Jones
I am so impressed by the workmanship you put into this beautiful project. I’m redoing a 72 B and am hoping that it just runs well enough to drive!
February 11, 2023 @ 8:53 pm Craig S Wolever
Thanks Al. These little cars are a blast to drive, so I’m sure you can’t wait to drive yours. Getter done!
October 19, 2022 @ 4:31 pm Doug
Yes, wire wheels and knockoffs cause pregnancy. Happened to me too.
February 11, 2023 @ 8:57 pm Craig S Wolever
So that’s how it happened! I always wondered !?
January 4, 2023 @ 12:10 pm Joel Lester
So awesome to see someone build a British sports car and make it “custom”. Too often these cars are built back to their original state. I may be crucified for saying that but personally I’m a hot rodder and like to see personal touches. This looks like a really fun built and tastefully done! Nice job!
Joel
February 11, 2023 @ 9:01 pm Craig S Wolever
Thanks Joel. I want to be more of a hot rodder but don’t have much experience swapping engines. Any ideas of what kind of engine would be good to put into my mg? Should I go with a v6, v8, or maybe a turbo 4 cyl? I just need some more horsepower!
March 8, 2023 @ 7:01 am MSGDLD
A good place to start for info on engine swaps is http://www.mgexp.com. There’s a forum specifically for engine swaps. GM V6, the 3.5L GM/Rover V8 and Ford 302 V8 all have kits and a lot of info on swaps, and theater’s less common ones with more fabrication. Your welding skills are a plus.
The MGB is a versified platform with enough shell strength to support an amazing amount of horsepower and torque.
You build looks great, have fun! Also, I’d recommend driving it at least a year and going to some shows, particularly the V8 shows, to get a better idea of what route you’d like to take.