


by Ned Serleth with artwork by Howard Stacy
What could be more cathartic than tinkering with our British autos? Bashing our heads against a wall? Jumping into the North Sea? Consuming vast amounts of alcohol? Naw. Working on our BMCs is good for the heart and soul, especially when the hard work is done, and it’s just about tinkering here and there and everywhere before hurtling down the road for the last time preparatory to putting our lovely machines away for the winter.
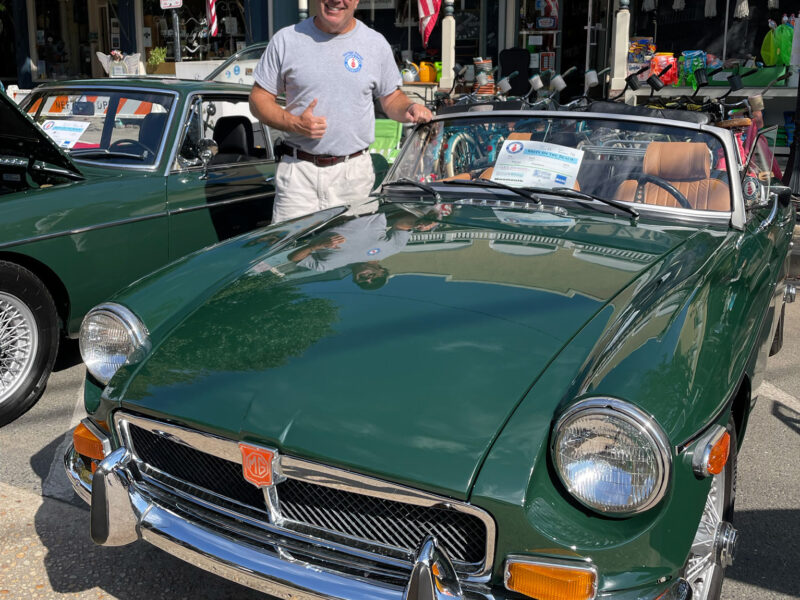
All summer long, the MaGi had been suffering from a long-traveling brake pedal, requiring it to be smashed into the floorboard to effectively come to a stop before ending up in the trunk of someone’s Buick, or more likely, a F150 pickup bed. Most jaunts comprised tooling around country roads, but the city itself with its maniacal drivers and local car shows rarely enjoyed the svelte black beauty of my 1957 MGA or the ingenuity displayed by the Morris Garage. No, before the last excursion prior to the long winter sleep, I have to fix the brakes, namely via a rebuild of the master cylinder.
However, before I’d tackle that running back, I needed to look into why the gas gauge hadn’t been registering any petrol, though the gauge had been rebuilt and reinstalled. Naturally, my first inclination suggested the gauge wasn’t properly repaired. Then I thought, “No, by golly that’s what West Valley Instruments does for a living. It must be the sending unit since I didn’t replace it during the rebuild.” Off to my Moss Motors parts catalogue I went in search of part #360-28.
Christmas arrived a few days later when a new sending unit found its way to my doorstep. Thinking I had used up most of the gas in the tank, at least below the sending unit’s lowest attachment screw, I jacked up the rear end, removed the right-rear wheel, and proceeded to unscrew the unit from the tank. Well, no sooner had I released the pressure at the gasket than gas began seeping out and onto the floor where I was lying on a rubber mat that creates static electricity. Of course, I realized the danger of my predicament and immediately reinstalled the lower screw and rolled away from the car without moving the rubber mat or touching any part of the car. I’m no fool.
I didn’t really feel like loosening the drain plug and pouring gasoline into a bucket that would undoubtedly be too small, so I figured, “Let’s drive the car around Ryan or Potato Farm Road a few more times and run out of gas five miles from home.” I hopped in the little roadster and proceeded to bring my idea to fruition. Wouldn’t you know it, those pesky little gremlins had been playing tricks on me. As I headed out Bowman Loop, I happened to notice the gauge now worked! It read a quarter tank. Hallelujah! Anyone need a new sending unit?
Now you might think with the gas gauge issue resolved, I would dive headfirst into a pool of spilt brake fluid, but that much-anticipated task would have to wait. I wanted to make sure all the bolts I hadn’t torqued were still in place. Sometimes things would bounce off the underside of the floorboards, but, shoot, I had just written them off as pieces of broken asphalt from aging country roads.
Naturally, the first thing I had to do in order to check for loose bolts was jack up the car again with my slow-leaking floor jack and quickly place jack stands under the slowly lowering car before the asthmatic jack wheezed out all its air. No problem. I had done it a thousand times before.
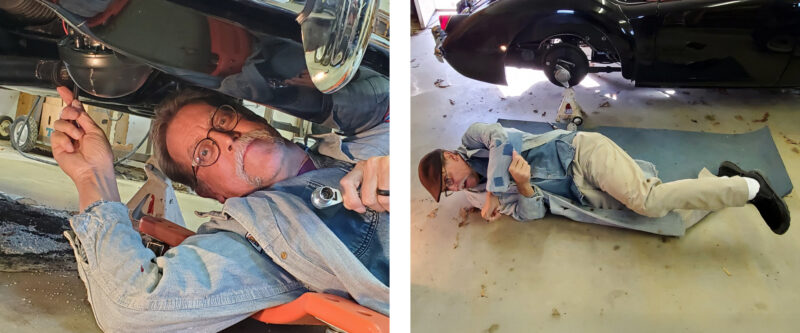
With the car balancing on antique jack stands, I soon found myself under the precariously supported British sports car. All bolts seemed snug and happy in their homes, snug and happy that is till I checked those of the rack and pinion steering. Thankfully, the two rear bolts were as tight as Dick’s hatband. The two front ones though, had been thinking of running away from home. A 15 mm socket and wrench convinced the two wayward bolts that it was in everyone’s best interest to remain firmly in place.
During all this “check each bolt” inspection, I was fortunate enough to get my sixty-eight year old body up and down from the creeper more times than I have fingers and toes as I returned to the toolbox to retrieve what I thought would be the right size tool. Yoga has nothing over tinker time aerobics.
Just to be sure the steering would perform admirably, I thought, “Maybe a little more 80 weight would quench the R & P’s thirst.” Since adding fluid without the proper tool happens to be my modus operandi, I grabbed up my decommissioned vodka shooter, filled it to the brim with 80 weight, removed the refill nipple, and commenced to shooting, thereby putting those pesky gremlins to work. Soon, I had fluid on the floor, on my face, and some in the rack. Good job, well done.
With the master cylinder constantly nagging at me, the time had come to address its issue. A flannel sheet draped over the fender would protect it from dropped tools, spilt brake fluid, and belt buckle gouges as well as help polish those cursed scratches that seem to appear overnight.
After finding the right size wrenches, removing the clevis pins from the push rod forks, and the bolts holding the master cylinder in place, I lifted the baby out of its cradle in order to more easily unscrew the adapters and remove the lines. A smile creased my lips when, with the lines removed, I was able to extract the master cylinder as easily as pulling a loose molar, without fluid running everywhere in its attempt to eat paint.
That done, I disemboweled the cylinder. Its springs, rubber washers, and pistons were cleaned and laid out in order of dismemberment. Then like looking forward to another Christmas morning, I awaited my rebuild kit (part #180-971) from Moss.
In a couple days the kit arrived, and I promptly retired to my fallout shelter to rebuild the master cylinder. After dousing each of the rubber seals with DOT-4 brake fluid, everything went into place without a hitch, which is unusual.
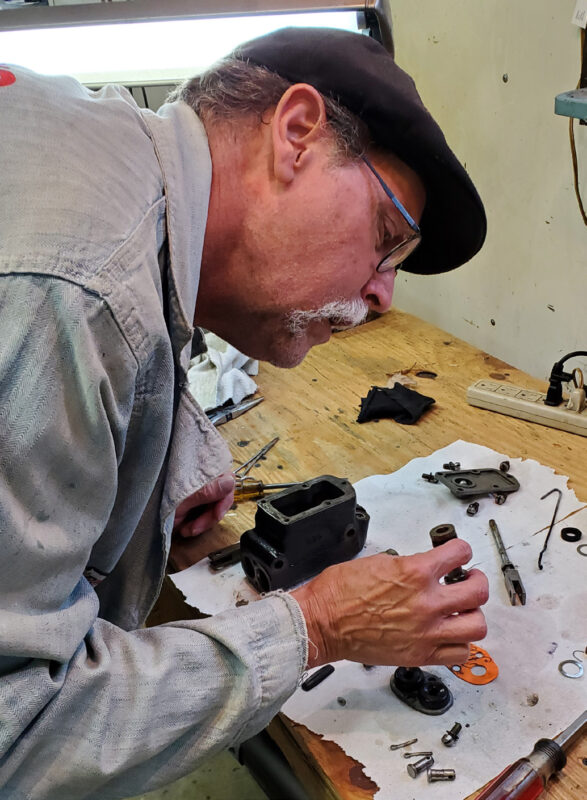
This time I made it a point to bench bleed the master cylinder before installation. I had heard little pockets of air can become trapped behind the pistons. Cutting an extra brake line with its accompanying adapter and giving the pipe a curve so the end would sit in fluid became step two. Again, no problem. “Something’s up,” I thought.
Well, I placed the whole thing in the vise, grabbed one of the pushrods, and commenced to pumping. You guessed it. A geyser of bubbles and brake fluid shot into the air like Old Faithful. But again, I’m no fool, my hand kept most of the brake fluid off my face. Faster than you can say Jack-Be-Nimble, the master was ready for installation.
Another strange abnormality occurred when the brake and clutch lines reattached without difficulty, and the master returned to its cradle like a sleeping baby. All that was left was to bleed the brakes for the thousandth and “two” time.
Ted dropped off Rich’s pressure bleeder, and we talked about how he had to trailer a Jaguar E series to a shop in Knoxville to discover why it wouldn’t work for the thousandth and “three” time. After he left, I made plans to bleed the following morning.
There’s no telling where those pesky gremlins were. They must have been on some sort of exotic vacation because the brakes bled admirably, and the clutch slave cylinder easily expelled all the air bubbles which might have caused it some indigestion. However, a certain sense of trepidation lingered since I had yet to test the shoes. I hopped into the seat and put my foot to the pedal. Rats! I only gained a half-inch of travel. I guess that’s just how it goes.
Anyway, I took the little roadster out for a spin and slammed on the brakes right before Dead Man’s Curve. I wasn’t thrown through the windshield or anything, but the brakes easily stopped the car. Surprisingly, everything worked to my advantage. Hopefully, the gremlins will stay in Cancun drinking Margaritas during my next tinker time in Tennessee come spring.
'Tinker Time in Tennessee' has 1 comment
November 20, 2025 @ 7:27 am Bill Laycock
Dead Man’s Curve? That sounds as if you might live near Ooltewah, TN. Is that correct? That is definitely a serious curve with nothing but a vertical, stone wall to gently slow you if you’re carrying excess speed when traveling in the southern direction. Been graciously forgiven by it many times when dating a certain young lady from Cleveland , TN who has been my wife now for over 53 years.