


Readying a ragged-top TR6 for rainy days
By Rob Mullner
I’ve been working on my ‘73 TR6 for the last four years and have conquered the majority of its mechanical demons and previous-owner neglect. In my single-mindedness to whip it into mechanical shape, I’ve ignored the “soft stuff.” The convertible top stood out for two reasons: The previous owner incorrectly installed it, and, at nearly 20 years of age, it was just worn out.
Perusing the pages of the Moss Motors catalog, I found everything required to install a new top, including all the seals, straps, and channels. Moss still offers the original-style TR6 top with the reflective stripe. One of the themes behind my project is enhanced safety, so I figure that the shiny silver stripe might keep me from accidentally swapping paint with some double-latte swilling SUV driver.
Moss Motors has offered Robbins tops for decades. With more than 500 top patterns in its active database, Robbins has every top available for any British roadster in OE-style materials. (Applications are also available for later-model import and American roadsters.) Currently located in Ventura, California, Robbins Tops has been in business since 1943, and their state-of-the-art pattern cutting and heat-sealing machinery work alongside skilled craftsmen and women who assemble tops by hand for a perfect fit. Robbins follows the original top patterns and makes subtle improvements to enhance the fit and wear characteristics of the top.
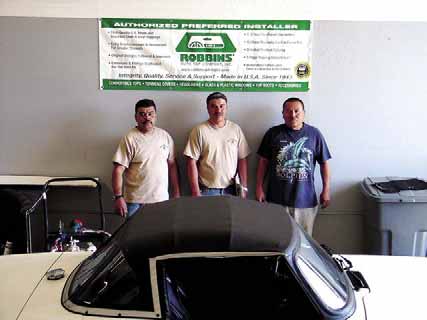
British car fans who have upholstery experience might approach this as a DIY project, but those of us who’re better with a wrench than a rivet gun will likely want to have their high-quality replacement top professionally installed. Robbins owner Doug Robbins referred us to Quality Upholstery in Ventura, California. Robbins uses Quality for most of their prototype and special projects, and Quality general manager Celso Conchas and installers Carlos and Javier have more than 50 years’ combined upholstery experience.
Installation highlights are shown in the photos and captions. Celso estimates this job takes between 4-5 hours.
Once the new top is in place, leave it in the up position for the material to take the shape of the top frame. Celso recommends leaving the top up for two weeks and advises against using Armor All or similar treatments. Hand washing with mild soap and water is his preferred method of care.
On the drive home from Ventura, I stopped for fuel and marveled at how the new top had transformed my car. It looks great and has inspired me to work on the interior and some other appearance projects I had been putting off. Now about that nasty windshield and those bent bumpers and those crash pads…
 1. Here’s the new top awaiting installation. Quality Upholstery prepped it by masking the windows inside and out to avoid scratches or errant glue. (Moss Motors also offers Robbins replacement rag top kits for other British sportscars.)

2. Remove the old top from the folding frame. Note how Quality uses a pad on the hood to keep their tools from scratching the paint.

3. Remove the handles that secure the top to the windshield header. Drill out old rivets securing the webbing to the frame, and the top to the header and rear bar, and remove the weather strips and hardware securing the channels to the frame. We were able to reuse the old hardware. Scrape any old glue off the header and side rails.

4. Check the top frame for any loose hardware or bent bows, if needed. Correct any frame bends as delicately as possible. Moss doesn’t offer replacement top frames yet, so either go easy or go eBay.


5. This is a good time to unbolt the rear bar from the car and touch up the frame and rear bar. The install will look even better upon completion.

6. Once any touch-up paint has dried, glue new Velcro strips to the window frames.

7. Using an awl or a razor blade, punch small holes through the vinyl backing for the screws to attach the aluminum channel.

8. Measure and run new webbing from the header rail to the rear bar. For accuracy, Celso refit the rear bar and top-securing handle before riveting the straps.

9. A neat trick is to glue a small piece of carpet backing or other thin material to the top of the rivet strap to avoid wear and accidental snagging of the top on the frame. Excess glue will be removed before the top meets the frame.

10. Celso also puts a small piece of trunk seal on each side of the header where it could be pushed against the top (cheap insurance against your new top getting hurt).

11. Mark the center of the rear bar and header.

12. The rear bar is the key to a good install. Patience and an extra set of hands are helpful here. Apply glue to the rear bar and line up the scribe marks on the top with the holes in the rear bar.

13. Once the marks and holes are lined up, smooth the material onto the rear bar and work with an assistant to get rid of any creases. Wrinkles here will definitely show later.

14. Moving to the header bar, line up the scribe marks on the top with the bar, test-fitting as you go. Use the tabs on the side as a reference point—they should fold over and meet the side rails squarely. Glue the top to the header rail, making sure that any creases are removed. (If necessary, pull the top away and re-attach—the glue stays tacky for 30 minutes.)

15. Rivet the new header seal rails to the header and trim the excess top material, using the header rail as a guide.

16. Push the new header seals in the channel. The header seal and window rubber will form a joint to keep out the weather. Trim excess seal material.

17. Moving inside, secure the two top tabs to the frame with the supplied hardware. These tabs help hold the top’s shape by aligning its seams with the top bows.


18. Attach snaps, starting at the center of the rear bar and working toward the doors, using the existing snap holes as guides.


'Convertible Top Install' has 1 comment
July 21, 2025 @ 9:38 pm user-159117
awesome