


MGB Radiator Replacement
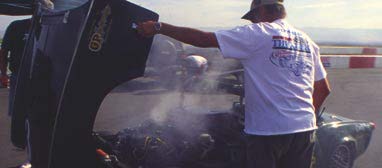
The smell of warm anti-freeze and the ’62 MGB’s right-pointing water temperature gauge indicated a serious cooling problem. Lifting the hood confirmed it: green wetness adhering to the soundproofing on the bonnet’s underside.
This almost 40-year-old radiator had served well and recently survived a cross-country odyssey. However, the metal top-hose outlet had a small crack. Stop-leak minimized the problem but didn’t cure our water loss. The dilemma was to rebuild the existing radiator or replace it with a new one. Regardless, an in-and-out is required. It’s a relatively simple task that involves minimum loss of blood and takes about four hours, if everything goes to plan. (Quoted time from British Leyland’s Repair Time Schedules [1976] is 1.1 hours, with a further hour allowed to drain, flush, and refill the radiator.) This article shows highlights of the job; refer to a service manual for more detailed information.
With the engine cool, begin by draining the coolant. Loosening the radiator cap expedites draining. Remove the lower hose if the radiator lacks a drain plug or petcock. (Removing the bottom hose often entails accessing the hose clamp from the bottom. If jacking up the front of the car, safely secure the vehicle on jackstands.) Capture and properly dispose of old coolant, which is toxic yet tasty to pets.
Unscrew the two support bars that affix the radiator to the inner fender. At this stage, we discovered the root of our problem: These supports were missing, and the radiator likely flexed under rough road conditions.
Remove the bolts that hold the radiator to its shroud—three down each side of the radiator (the topmost is longer than the others to accommodate the support bar). Next, undo the bolts that secure the shroud to the inner fenders (four bolts on the left side and five on the right).
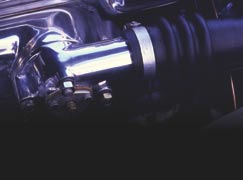
If you don’t have an oil cooler, the radiator can now be lifted out of the engine bay. If you have an oil cooler (as we did), then lift the shroud from the driver’s side and slide the radiator out from beneath it. This avoids having to unfasten the oil cooler lines, which pass through the driver’s side of the radiator shroud. With the radiator removed, inspect your fan, fan belt, and water pump. You might also want to repaint your fan before replacing the radiator.
We thoroughly flushed the new radiator with clean water to remove any debris that might have accumulated during packing and shipping (including a dead spider). At this point, we noticed that the packing strips that cushion the radiator against the shroud had been installed incorrectly: two on one side and none on the other. This misaligned the radiator, which likely contributed to it cracking at the neck. We supplemented this job with new packing strips and also added a brass drain tap to the new radiator.
To ease installation, clamp the bottom hose to the new radiator before inserting it into the engine bay. Secure the packing strips using only two of the setscrews to hold the radiator to the shroud. Align everything carefully and replace the bolts that hold the shroud to the inner fenders.
We recommend greasing all captive nuts prior to installing the radiator and shroud in the car. Alternate sides when tightening the nuts to avoid damaging the threads.
The trickiest bit is attaching the bottom hose to the water pump connecting pipe—space is rather restricted here. A liberal dose of WD-40 just inside the hose allowed it to slip onto the pipe fairly easily. Finish the job by replacing the two supports bars, making sure that the clamp that holds the cable-release outer casing is firmly attached to the left support’s nut and locked into place.

- Release the bolts that secure the radiator to the radiator support.

- To avoid having to detach the oil-cooler lines, unbolt the driver’s side of the radiator support.

- Detach the radiator from its support/shroud and remove it from the engine bay.

- We also chose to replace the packing spacers that mount to either side of the radiator support. Now’s also a good time to replace the shroud’s upper seal if necessary.

- Replace the hoses as necessary before reinstalling the new or rebuilt radiator. Early MGB brass drain plugs can be retrofitted with a petcock to facilitate draining. Reinstall the radiator by reversing the disassembly process.

'MGB Radiator Replacement' has 1 comment
August 16, 2021 @ 9:48 am bob
i have a 1971 MGB GT. overheating or the needle goes to right side halfway between the middle and the high side during idle. but when dring, it will get to the high side. i checked the thermostat with hot boiling water in a glass bowl to see if working. no problem with this temp-stat. i did have coolant sipping out the radiator topside, used the stop leak. i believe some of the radiator internal coils could be blocked. i will remove it and take it to the radiator shop do an overhaul or a new one, depends on the cost of new and refurbished.