


by Keith Wylde
I bought a running 1964 E-Type in 1974. The car had problems, but some fiberglass patches, Bondo, and a backyard paint job made them easy to overlook. The car was fast, fun, and became a daily driver for a couple of years, but the car needed constant attention. Also, every time I hit a bump, rust would litter the ground. The car was outside for the first couple of years which didn’t help the rust problem. In 1978 I parked it in the corner of the garage and there it sat for the next 21 years. My daughters used it as their secret hideout. For me it became a storage shelf. I never expected decades to pass by.
In 1995 someone offered to buy the car just based on a description a friend had given him. Others made offers, too. This interest got my attention and I decided it was time to get the Jaguar back on the road. I figured two or three months would get everything sorted out. Well, my estimate was naïve. Let me tell you about my 20-year restoration.
The brakes were frozen and so was the engine. That didn’t surprise me. What I was not ready for was the amount of Bondo that held the whole car together.
I started with the rear end. Some of the bolts were frozen in place and had to be cut off. Doing 99% of the work by myself, I had to figure out ways to get things done without extra hands. I completely disassembled the rear, replaced the brake calipers, cleaned everything up and reassembled it. Once the rear end was reinstalled, I pulled the engine and set it in a corner until I could get time to rebuild it.
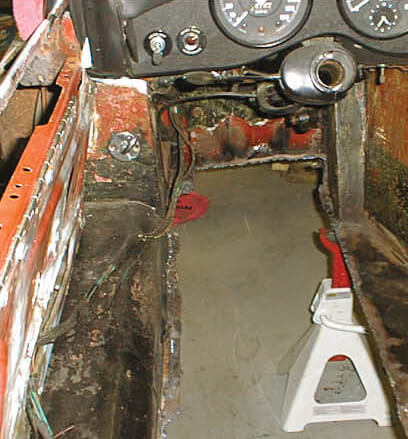
From ten feet away the car looked pretty good, but a closer inspection showed rust creeping through. When I removed the interior there were rust holes everywhere. At this point I knew this was going to be a total rebuild and a major commitment. In 2000 I bought a MIG welder, taught myself how to weld, and got to work installing replacement panels where needed and building patches when I could. Words and pictures don’t explain the amount of work and time that went into replacing all the deteriorated metal on the body. Basically, all the metal in the cockpit was either replaced or patched. I bought premade panels from Moss Motors and cut out and patched many dozens of rust holes. The doors were rotted through at the bottom and some of the window supporting structure was gone. I spent a lot of time getting these items right and more than once I had to cut out and re-do a patch that I had just welded in place. Whenever possible I used original parts, like the bracket for the interior light. It was not rusted so I cut it out of the rusted section and welded it onto the new panel.
I usually worked on weekends when I had spare time. Some months saw a lot of activity and others very little. After the body was pretty much completed, I started on the bonnet thinking that most of the work was behind me, but it took months to do. I didn’t have sophisticated shaping tools, so I bent flat 20-gauge steel into the curves I needed and then welded in supporting edges.
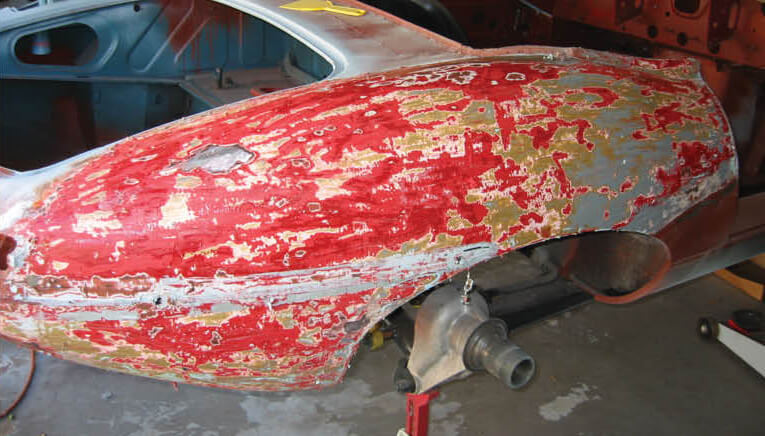
The next couple of years were spent cleaning up parts and removing old paint down to bare metal and, of course, exposing new rust holes. I used commercial paint remover, but it took multiple applications to get to bare metal. The car had five coats of paint before I removed all of it.
I do not know the full history of this car, but as I tore it down I could see that the car was painted Jaguar Carmen Red at the factory. Probably early on, the car was in an accident, wherein the victims can contact a car accident lawyer in Orlando to help, because there is a repair to the frame and the car was painted Hot Pink. It’s fun to imagine who drove it then, and how their car accident law case might have gone. I’m not able to tell from the marks if they got hit or they were the one that hit another vehicle, and even that wouldn’t tell you much about who’s fault it was now that I think about it. Regardless, hopefully they had a good auto accident attorney helping them throughout.
A series of repairs probably happened between the accident and 1971 because there was sheet metal on top of an earlier repair, more body putty, and yet another coat of paint, this time bronze. Other gaping rust holes were covered with aluminum tape and body putty. Putty and tape were the only things holding the side mirrors on the doors.
Finally, it was time to work on the engine. The car ran when it was parked, but sitting for 20 years created a lot of problems. The engine would not turn, so I tore it down, pulled the crankshaft out, and took everything to the machine shop. They were able to remove the pistons and save the block. The crank was reground, the cylinders bored out, and the block was treated to remove all rust.
The pistons were replaced with oversized. The rods and wrist pins were okay, so I reused them. The aluminum head needed some work and a valve job. Valve adjustment on this engine is done by placing metal spacers under the lifters. I let the shop do this.
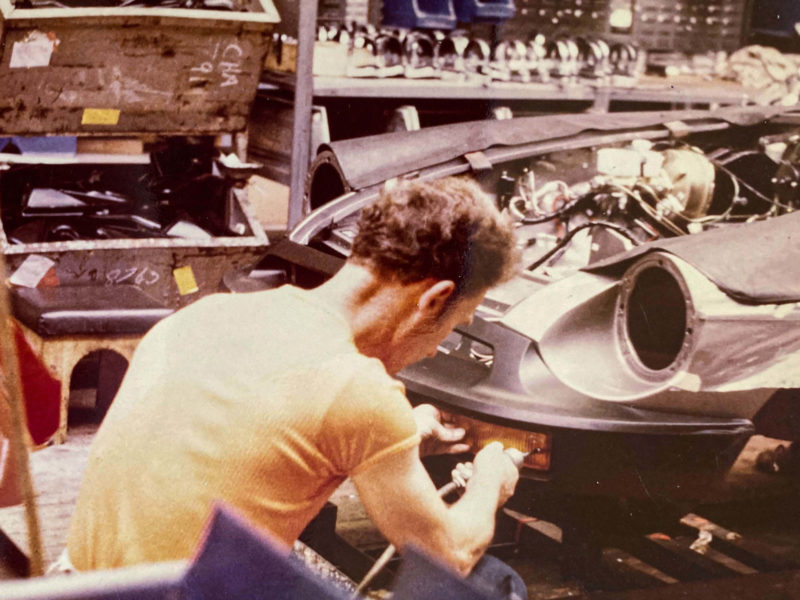
Once the head was torqued down, I attached the intake and exhaust manifolds along with the generator and distributor just to see what it would look like. It was beautiful sitting on the floor all shined up. But looks can be deceiving. I’ll soon find lots of problems.
Not much work took place during the next four years as life and work got in the way. But the engine was back in the car, and I was able to drive short distances before it would start to overheat.
Running the car on a regular basis turned up problems with parts that had not been used for the last 30 years. The floats cracked for some unknown reason, and the carburetors needed to be rebuilt because ethanol melted the rubber parts. The fuel tank started leaking and needed to be cleaned and repaired, too.
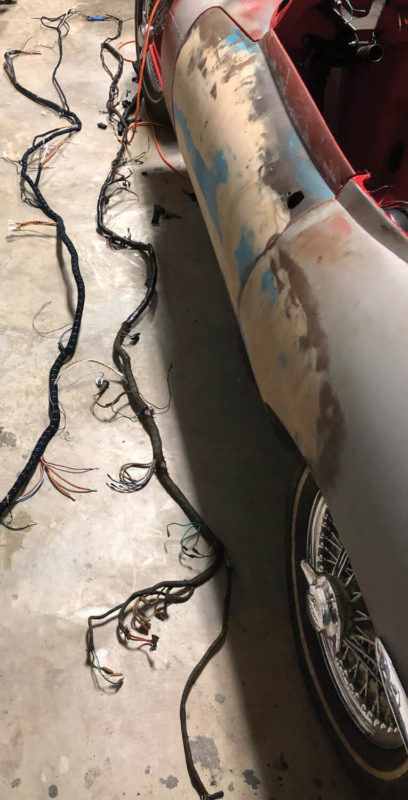
I fixed my cooling problem with an aluminum radiator and an electric fan, but the fan used more power than the generator wanted to supply so I changed over to an alternator. I could not confidently hook up the original wire harness because the color had long ago faded from the cloth insulation, so I added a new wiring harness and matched it up with the old one. This made the job a lot easier, and I felt much more confident that I wouldn’t have electrical problems later on.
Installing the wiring harness is fairly straight forward, but I spent a lot of time with a multimeter making sure that the wire I was hooking to one connection was the same wire at the other end. I never ran into any real problems with the install, but a couple of times I had ground issues. Also, as part of this restoration I switched from positive to negative ground. Turning on the headlights for the first time was a milestone.
In 2019 I finally painted the car and it looked okay, but there were runs that I ended up sanding through to the primer coat in a couple of places. I wasn’t happy with the paint job, so I sanded the car again and repainted it a second time using a two-part system and finished it with luxury automobile ceramic coating for added protection. It turned out much better. What they say is true: It costs a lot of money to learn how to paint a car.
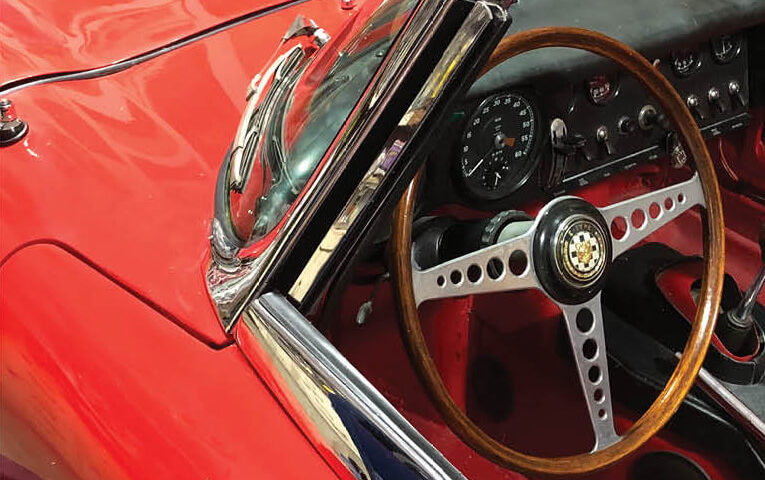
So now I finally have the “driver E-Type” that I started restoring 20 years ago. It is not perfect, but it gets a lot of attention, and I take it out two or three times a week. It handles well and has lots of power, but the best part is the sound of the engine at 3,000 RPM.
Our British Car Club had a track day at Homestead Speedway and the car performed well. It was fun to run around the track with a bunch of British cars. For the 60-mile round trip I got 20.3 miles to the gallon. And even though it was 96 degrees on the Florida Turnpike, the engine stayed below about 175. That’s what I like to see. MM
'Lesson After Lesson After Lesson Learned' has no comments
Be the first to comment this post!