


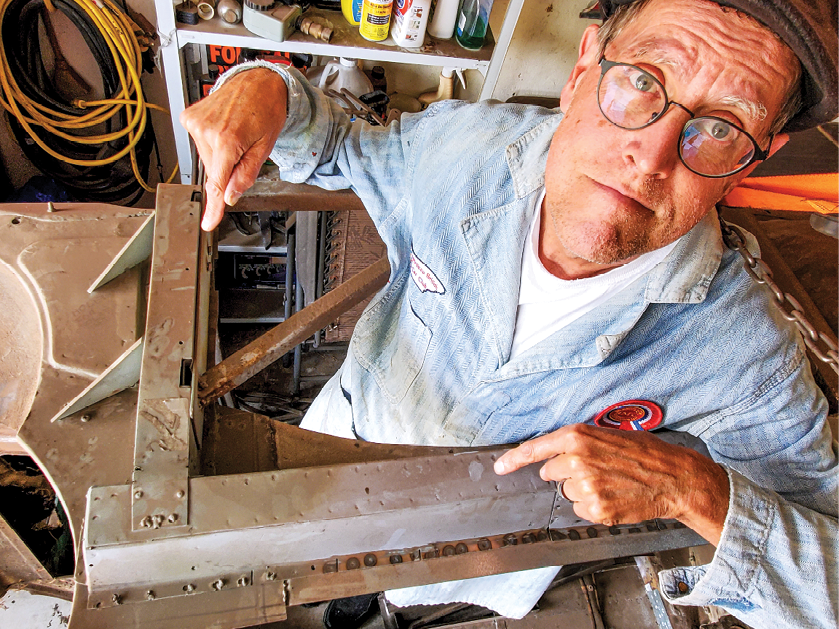
by Ned Serleth
Perhaps you’ve read my last DIY exposé in Moss Motoring on working on your MGA. Well, let’s ramble on and address another step of the restoration process: body repair, especially those infernal B-posts, sills, and accompanying rocker panels where rust grows like weeds in a garden, causing the body of your MGA to become two pieces of the same vehicle. Hopefully when it’s your turn to attempt replacing those pieces of metal Swiss cheese, a few step by step “Dos and Don’ts” instructions may save you what’s left of the hair on your head. So here we go…
Step One: Remove all body parts needed to expose rust issues, breaking off a minimum of three bolts in the process.
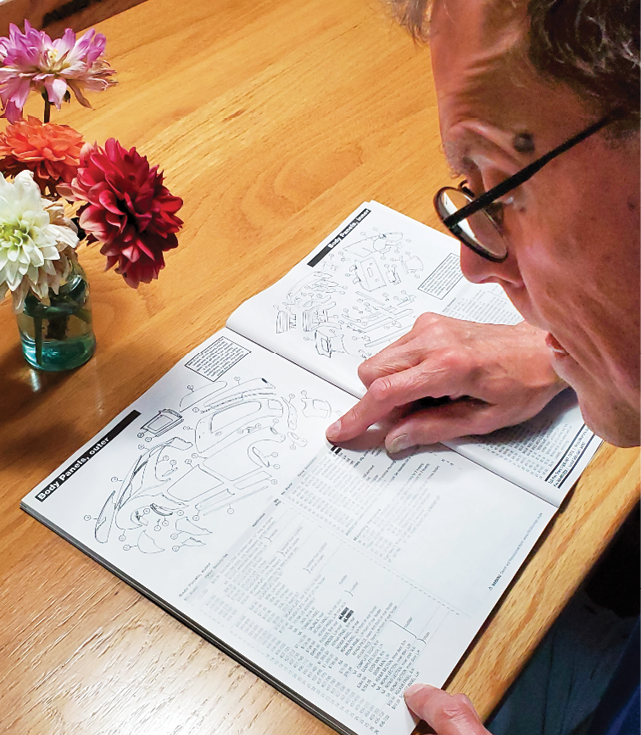
Step Two: Since you’re just getting started, “Do” thumb through your brand spanking new Moss Motors parts catalog and decide which stamped steel components you’ll be needing to resurrect the barn-find-rust-bucket you’ve chosen to restore.
Step Three: Once you’ve gotten your replacements, the next step is to outline with a useless marker how much of the decomposing body must be amputated, using new parts as a guide.
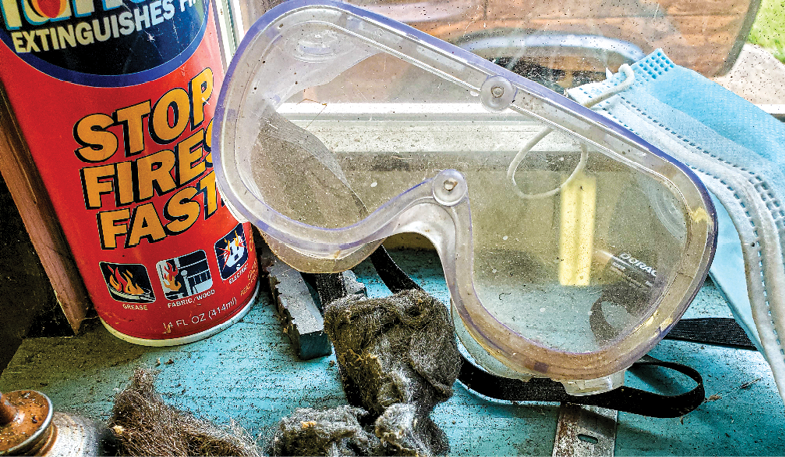
Step Four: Once you’ve made those nearly invisible marks, it’s time to get rid of the rust, and what better way to do that than to whip out the ol’ Sawzall. “Do” be sure to put on a pair of newer safety goggles, instead of those scratched, sun-bleached, and fly specked goggles which you normally ignore and which lie forlornly on the windowsill, secured by a brown recluse’s web.
Step Five: “Do” be sure to take a few measurements before lopping off the rusty B-pillar and accompanying sill panels. “Don’t” forget to do this!
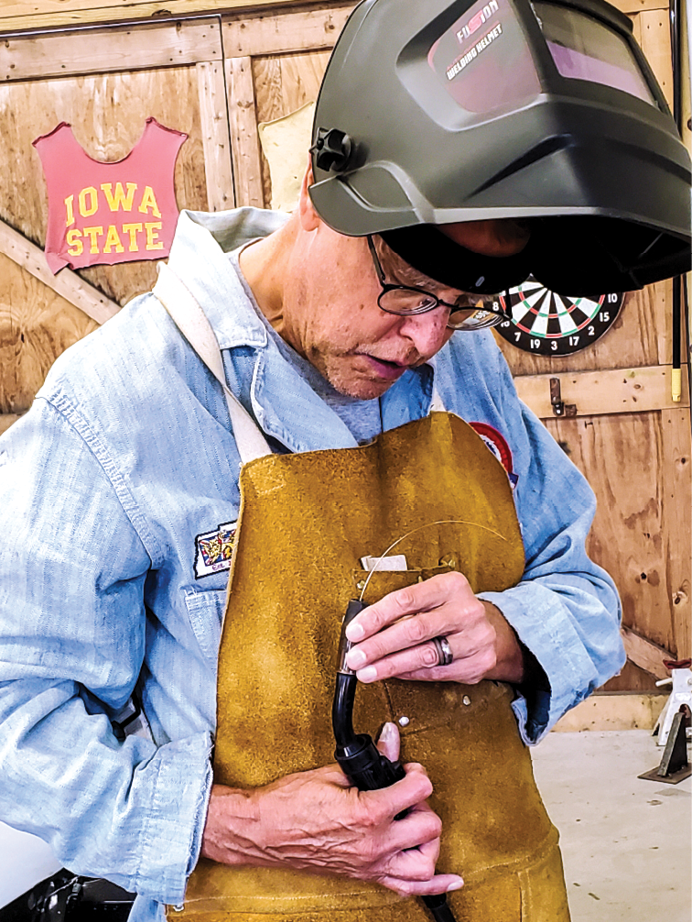
Step Six: “Do” adjust your M.I.G. welder before attempting to weld your MGA. If your M.I.G. is too hot, you’ll soon have a honeycomb of holes in those shiny new parts. “Don’t” forget to turn on your shielding gas, or you’ll have sputtering drops of liquid metal falling to the floor of your work space where they come into contact with the puddle of flammable fluid from the dripping oil pan and ignite, thereby scorching your floorboards and singeing those last few hairs on your head that you’re trying to save. Also, be sure to check the nozzle of the wire feed line to make sure it isn’t full of slag from the last failed attempt at welding when you forgot to turn on the shielding gas.
Of course, it goes without saying, you cleaned off the area where the B-post is to be connected so you get a good weld instead of just burning holes and sending drops of molten steel cascading to the floor like some kind of Mt. Kilauea eruption.
Okay, let’s say for the sake of argument you cleaned all the metal to be welded, you adjusted the heat setting on that wire feed welder, and the B-post is securely joined to the body with only a minimum of burn-throughs. Now it’s on to Step Seven.
Step Seven: Time to rehang the doors and make sure you’ve got a good fit.
Like I had suggested, those measurements you forgot to take sure would have come in handy before welding the B-post to the car with five pounds of welding wire. Did you allow space for the shut face panel that so many of us overlook and will make the door openings too small? If not, the only remedy is to get the trusty Sawzall back out and repeat steps one through six. If by chance all the metal blades have been smoothed off like teeth on an over-the-hill horse, an angle grinder with a cut off wheel gnaws through pounds of poor welds as easily as slicing off a piece of watermelon.
Step Eight: So, the B-post is in place and the doors fit. Now comes the inner sill. First, “Do” remove the door; it makes for an easier installation. Like with your previous welds: remove all paint, oils, blood, sweat, and tears. “Do” weld the new sill (part number 457-800 R/H and 457-810 L/H) to the A and B-posts. “Don’t” forget the lessons you learned in Step Six.
Step Nine: Your next welding challenge includes the top flange of the inner sill panel, sill plate, and sill. “Do” be careful not to apply too many globs of metal. Otherwise, you’ll have to grind off all that extra steel, which only adds to the unrealistic timeline you’ve set for yourself. Now do the same with the lower flange of the inner sill panel and sill.
Once again, you’ll want to make sure all the metal parts to be welded are clean enough to eat off. If by chance a friend of yours has a spot welder like my mentor Ted, it’ll be smooth sailing when it comes to attaching all those parts at one and the same time. Of course you’ll need a hundred or so Vise Grips to hold the pieces together and to get in the way of the spot welder, which weighs close to that of a Briggs & Stratton ten-horse mower engine. I found using two belts linked together as a strap to hang the welder around my neck—recommended by no back specialist ever—freed up my hands to make adjustments to the clamps while kneeling in the black soot from the burnt oil and floorboards.
Step Ten: You’ve done a fine job so far. The only piece left is the outer rocker panel. Don’t assume everything will line up correctly and all your troubles will be over. No sir. Remember what happens when you ass.u.me something.
Nevertheless, after clamping the inner sill panel, sill, and outer rocker in place, hang that back-breaking welder around your neck and commence to finishing the job.
Step Eleven: Spend time at the chiropractor to re-adjust your cervical alignment.
Step Twelve: It’s time once again to hang the doors to check the fit. Dang it! The lower driver’s side door wants to scrape the outer rocker. It would seem there’s a bit of a rise to the outside of the rocker. Naturally, this means the spot welds need to be drilled out, re-vise gripped, re-welded, and the chiropractor re-visited.
Not all is lost though since we learn from our mistakes. The second time to re-weld the lower flange, “Do” leave the doors on and place a used paint stick between the lower portion of the door and the outer rocker to help achieve a horizontal surface.
Looking at your finished product, you say to yourself, “Now, that’s a fine job, well done. Guess I’ll have a beer.” Oh, sure, you say that until you look more closely at your lower welds. Your spot welds are good, but do you remember those you drilled out? They still exist like black holes at the center of a thousand parallel universes. Thankfully, that’s no cause for concern.
As any good welder worth their weight in steel wire knows, with a practiced hand you can fill those holes with M.I.G. wire by just tapping the trigger, leaving a small bead which can easily be ground smooth. Besides, the finishing strip, which comes later and which so many ignore, works as beautifully as an invisibility cloak to hide those miscalculations.
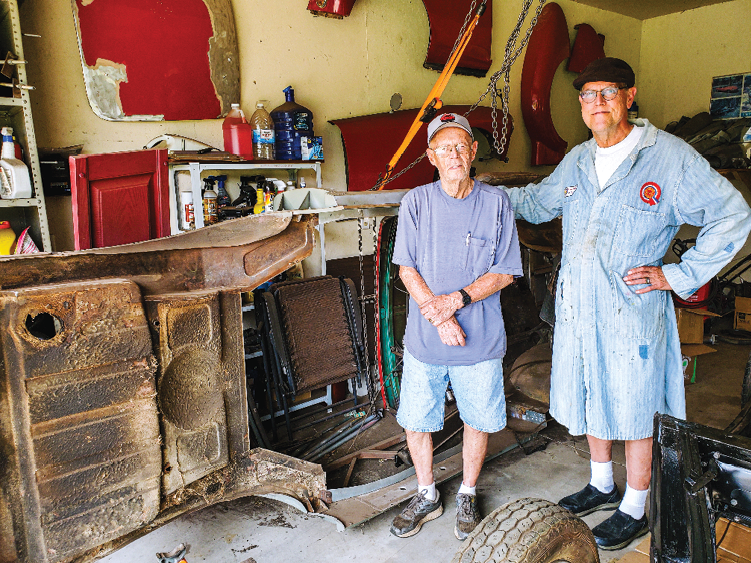
Step Thirteen: Great! All the rust had been eradicated and new parts gleam in their rightful place on both sides of the little roadster. Now, if you took the Dalai Lama’s approach, it’s time to unfasten the body from the chassis so you can begin removing 60-some years of grime, followed by dismantling brakes, brake lines, the gas tank, engine, gearbox, wiring, and more tasks than the length of this article allows. Since you did such a fine job welding the body back together and your workspace is limited, it’s perfectly fine to lean the body on its side against the wall of your restoration palace, keeping in mind to leave those strong braces in place, just in case.
There you have it. In thirteen superstitiously easy steps you have repaired the typical rust that plagues most older barn-find MGAs. Now is the time to take that break, pat yourself on your aching back, and have a beer. However, “Don’t” rest too long; more fun in MGA restoration awaits you.
Step Nine: Your next welding challenge includes the top flange of the inner sill panel, sill plate, and sill. “Do” be careful not to apply too many globs of metal. Otherwise, you’ll have to grind off all that extra steel, which only adds to the unrealistic timeline you’ve set for yourself. Now do the same with the lower flange of the inner sill panel and sill.
Once again, you’ll want to make sure all the metal parts to be welded are clean enough to eat off. If by chance a friend of yours has a spot welder like my mentor Ted, it’ll be smooth sailing when it comes to attaching all those parts at one and the same time. Of course you’ll need a hundred or so Vise Grips to hold the pieces together and to get in the way of the spot welder, which weighs close to that of a Briggs & Stratton ten-horse mower engine. I found using two belts linked together as a strap to hang the welder around my neck—recommended by no back specialist ever—freed up my hands to make adjustments to the clamps while kneeling in the black soot from the burnt oil and floorboards.
Step Ten: You’ve done a fine job so far. The only piece left is the outer rocker panel. Don’t assume everything will line up correctly and all your troubles will be over. No sir. Remember what happens when you ass.u.me something.
Nevertheless, after clamping the inner sill panel, sill, and outer rocker in place, hang that back-breaking welder around your neck and commence to finishing the job.
Step Eleven: Spend time at the chiropractor to re-adjust your cervical alignment.
Step Twelve: It’s time once again to hang the doors to check the fit. Dang it! The lower driver’s side door wants to scrape the outer rocker. It would seem there’s a bit of a rise to the outside of the rocker. Naturally, this means the spot welds need to be drilled out, re-vise gripped, re-welded, and the chiropractor re-visited.
Not all is lost though since we learn from our mistakes. The second time to re-weld the lower flange, “Do” leave the doors on and place a used paint stick between the lower portion of the door and the outer rocker to help achieve a horizontal surface.
Looking at your finished product, you say to yourself, “Now, that’s a fine job, well done. Guess I’ll have a beer.” Oh, sure, you say that until you look more closely at your lower welds. Your spot welds are good, but do you remember those you drilled out? They still exist like black holes at the center of a thousand parallel universes. Thankfully, that’s no cause for concern.
As any good welder worth their weight in steel wire knows, with a practiced hand you can fill those holes with M.I.G. wire by just tapping the trigger, leaving a small bead which can easily be ground smooth. Besides, the finishing strip, which comes later and which so many ignore, works as beautifully as an invisibility cloak to hide those miscalculations.
Step Thirteen: Great! All the rust had been eradicated and new parts gleam in their rightful place on both sides of the little roadster. Now, if you took the Dalai Lama’s approach, it’s time to unfasten the body from the chassis so you can begin removing 60-some years of grime, followed by dismantling brakes, brake lines, the gas tank, engine, gearbox, wiring, and more tasks than the length of this article allows. Since you did such a fine job welding the body back together and your workspace is limited, it’s perfectly fine to lean the body on its side against the wall of your restoration palace, keeping in mind to leave those strong braces in place, just in case.
There you have it. In thirteen superstitiously easy steps you have repaired the typical rust that plagues most older barn-find MGAs. Now is the time to take that break, pat yourself on your aching back, and have a beer. However, “Don’t” rest too long; more fun in MGA restoration awaits you.

'Some More Dos Than Don’ts When Working on Your MGA' has 1 comment
August 4, 2024 @ 5:12 am David L Pfaff
I love the unique commentary on the restoration of your MGA, I am in the process of restoring my family’s original MGA 1500 bought back in 1960 when an Air Force reservist of my father’s couldn’t make the payments on the car. As a child I remember my parents, who have since passed, having some memorable outings with the MG, they had joined the MG car club and went on many different events. I have been in the process of restoring this MG since 2000 and has moved from Fort Pierce, Florida, to Tallahassee, Florida, back to Fort Pierce, Florida, then to Okeechobee, Florida, to Port Saint Lucie, Florida, where the restoration began, to Boca Raton, Florida, then West Plam Beach, Florida, where it was stored for several years, and now has arrived in Stow, Ohio where the restoration continues. All of the movements from place to place was never on its own power! My sister and I, both in our seventies now, used the MG for high school transportation, she is so excited to see the MGA being resurrected from the grave and can’t wait to see it in it’s restored, running condition. This is a labor of Love and a restoration not only of a MGA but of lost memories. Please keep us informed of your progress and challenges you face in your labor of “Love”.